 Skip to main content Skip to footer

Oscillating multi-tools are amazing gadgets. They help you cut, sand, scrape, and even grind all sorts of materials. Whether you’re a beginner or someone who has done a few DIY projects, learning how to change an oscillating tool blade is super important. It helps you save time, work safely, and do a better job. This blog post will guide you through every step you need to know. Let’s start with picking the right blade!
Choosing the Right Oscillating Tool Blade
Think About the Job and Material
Before you pick a blade, ask yourself, What will I be cutting? Oscillating tool blades are made for different kinds of work. Some blades are great for cutting wood. Others are made for metal, plastic (like PVC), or even tough stuff like fiber cement.
If you pick the wrong blade, your cuts might not be clean. Even worse, the blade could break or damage your tool. So always check the packaging or product description. It will tell you what type of material the blade is made of.
So Many Blades, It Gets Confusing!
Walk into any hardware store or look online, and you’ll see dozens of blades. Some are skinny. Some are wide. Some have teeth that look like little sharks. With so many choices, it’s easy to feel lost.
Don’t worry. You don’t have to get the most expensive or fancy blade. You just need one that fits your job and your tool. Take a little time to read labels and learn the basics. That way, you won’t feel overwhelmed.
Make Sure the Blade Fits Your Tool

Oscillating tools come from different brands. Some blades only work with certain brands. Others are “universal,” which means they fit most tools. Always check the blade packaging to see if it’s compatible with your tool.
If you’re not sure, bring your tool to the store or take a photo of it to match with the right blade. This step is super important because using the wrong blade can cause problems or even hurt your tool.
Cheap Blades Can Work Too
Not all good blades cost a lot of money. Some cheaper ones can actually work just fine. The trick is to know what you’re doing and not push the blade too hard. If you’re working on a simple project, a budget blade might be perfect.
However, if you’re working on something tougher, like metal, it’s better to spend a little more for a stronger blade.
Look for Quality Brands
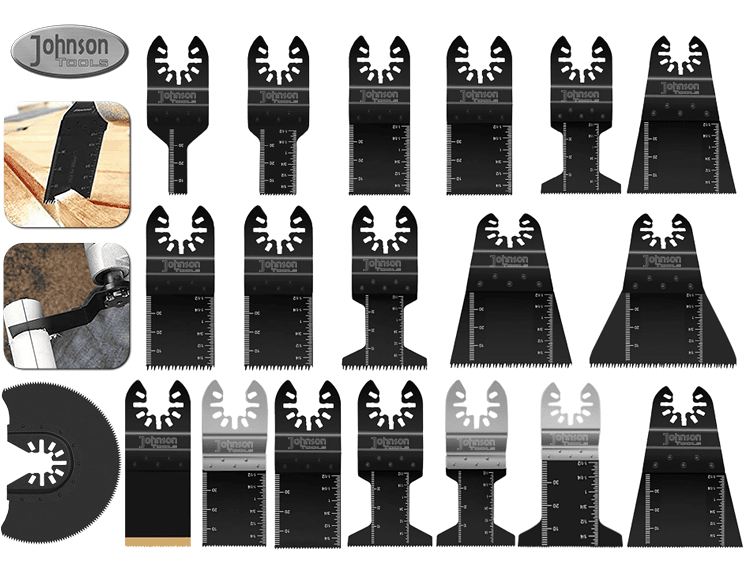
If you want blades that last longer and work better, look for blades from companies that are known for quality. For example, Johnson Tools Manufactory Co., Ltd. makes some really good ones. Buying from a trusted brand means the blades are tested and made well. They may cost more, but you’ll spend less time replacing them.
Pay Attention to the Teeth and Blade Material
Blades have different kinds of teeth. Some are sharp and pointed. Some are shaped like tiny waves. The tooth pattern can make a big difference. Also, check what the blade is made of. Some blades are “bi-metal,” which means they are strong and flexible. Others are “carbide-tipped,” which means they have very hard tips for cutting tough materials.
Match the Blade to Your Tool’s Speed
Oscillating tools move back and forth very quickly. This speed is called the oscillating frequency. Some blades are made to work best at certain speeds. If your blade doesn’t match your tool’s speed, it could wear out too fast or not cut well. Check the tool and blade instructions to make sure they match.
Preparing for a Blade Change
Get the Right Replacement Blade
Before you do anything else, make sure you have the right blade to switch in. Check that it’s the correct type and that it fits your specific tool. This small step can save you a lot of trouble later. Nobody wants to stop working just to run back to the store!
Always Wear Protective Gear
Safety first! When you’re handling blades, always wear safety glasses and gloves. Even if the tool is off, blades can be sharp. Glasses protect your eyes from dust or small pieces of material. Gloves protect your hands from cuts or scratches.
Turn Off and Unplug the Tool
Before you touch the blade or any part of the tool, make sure it’s turned off and unplugged. If your tool is battery-powered, remove the battery. Never try to change the blade while the tool is plugged in. It’s just not safe.
Learn the Tool’s Blade Change System
Different tools have different ways to hold blades. Some use a lever. Others use screws or quick-release systems. Take a few minutes to read your tool’s manual. It will tell you how to change the blade the right way. Knowing how your tool works will make blade changes faster and easier.
Keep the Blade Area Easy to Reach
Before changing the blade, make sure you can easily reach the blade area. If something’s in the way—like a clamp or an attachment—move it. Having a clear view and easy access helps you make a smooth and safe blade change.
Clean Your Workspace
A clean space is a safe space. Remove dust, tools, or any other things that could get in your way. This helps you focus on changing the blade and not on dodging clutter.
Step-by-Step Blade Change Instructions
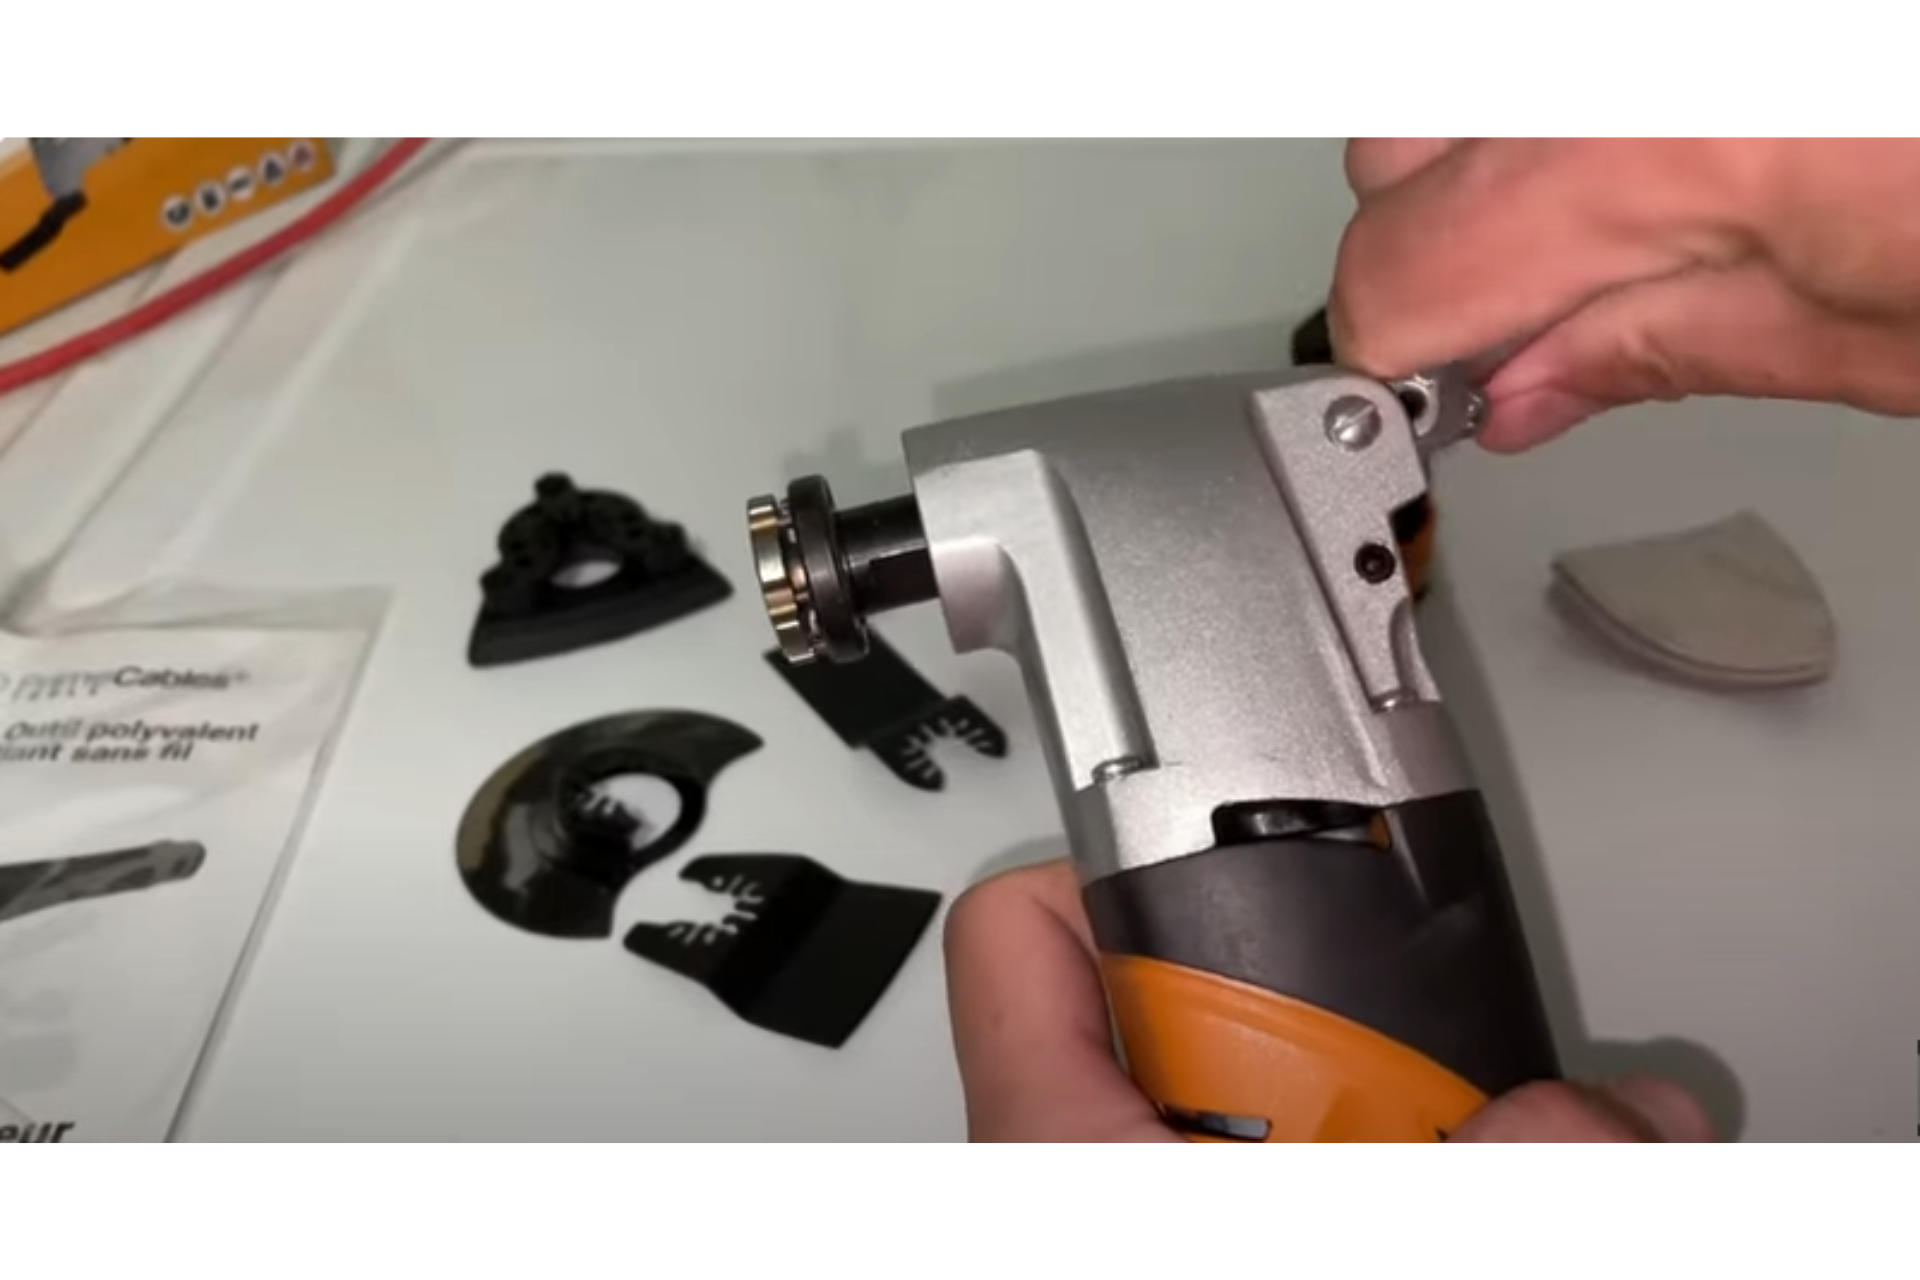
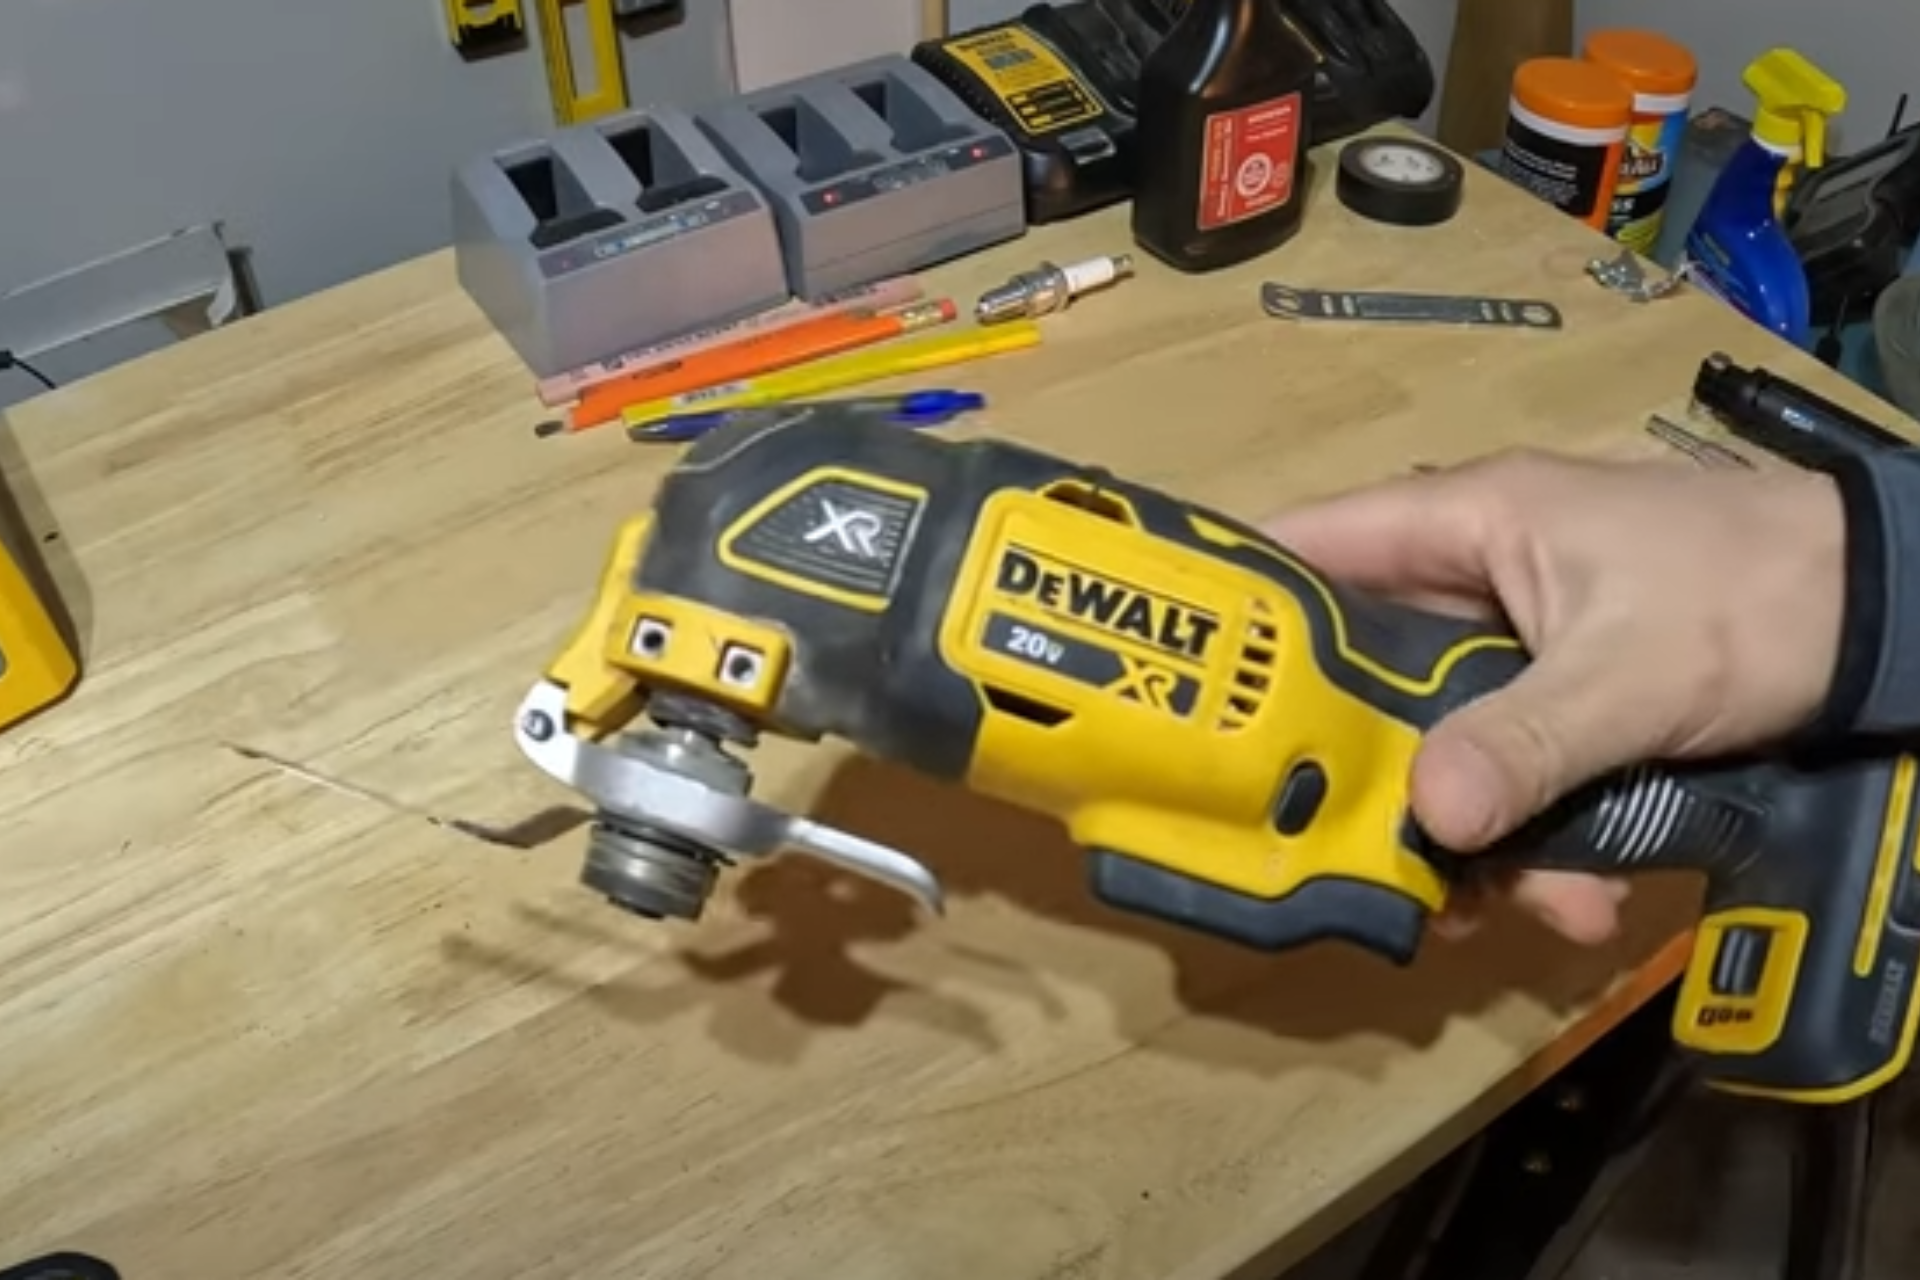
Find the Blade Release Mechanism
The first thing you’ll need to do is find the blade release mechanism on your oscillating tool. This is the part that holds the blade in place during use and allows you to safely remove it. Depending on your tool’s design, the release mechanism could be a lever, a pin, or a quick-release button.
In many tools, the release mechanism is located near the base of the blade holder, where the blade connects to the tool. Take a few moments to familiarize yourself with it before starting the blade change. If you’re unsure, refer to the user manual for your specific model, as the mechanism can vary by brand and type of tool.
Open the Mechanism to Release the Old Blade
Depending on your tool, you might need to pull a lever, push a button, or turn a locking nut to release the blade. Always follow the manufacturer’s instructions carefully here, as each tool might have slightly different mechanisms for releasing the blade.
For tools with a quick-release feature, make sure the blade is not under pressure when you engage the release. For other tools, make sure the locking mechanism is fully disengaged before removing the blade.
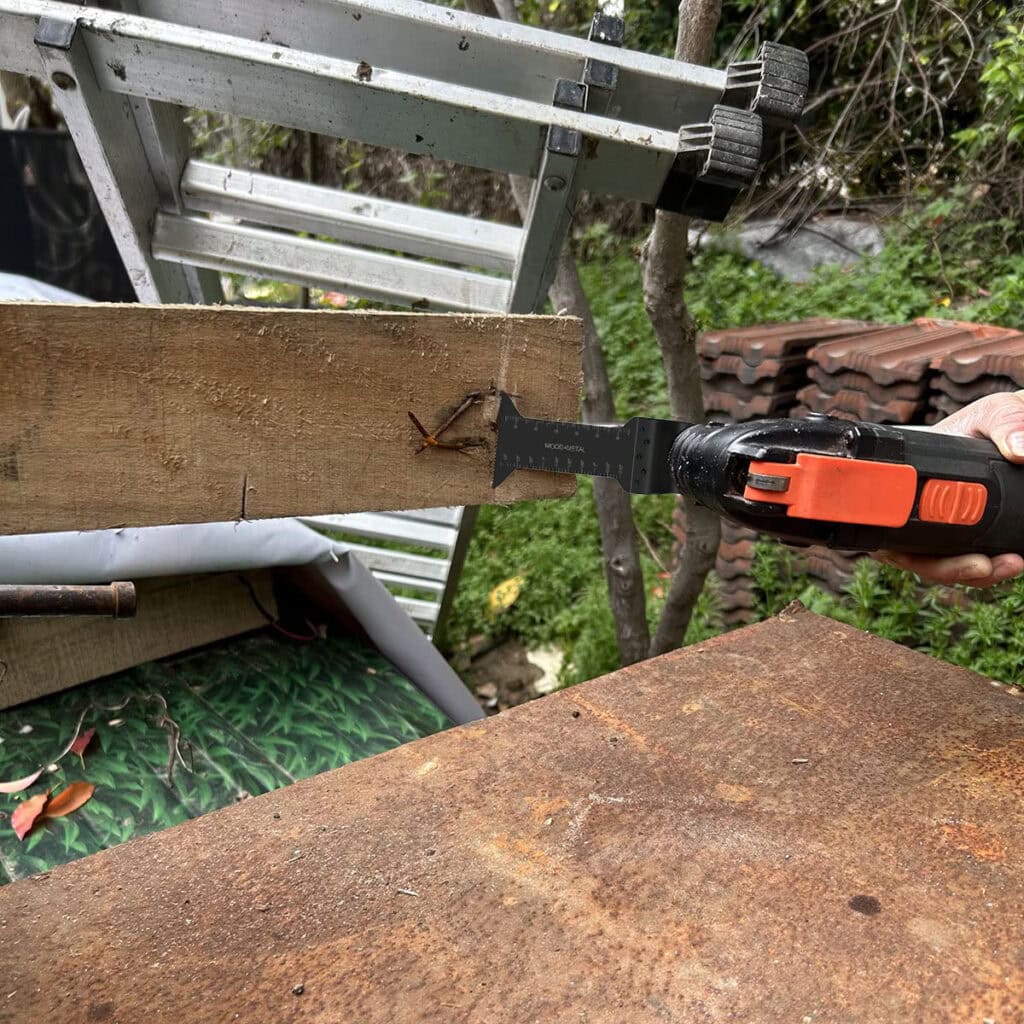
Take Out the Old Blade Carefully
Grasp the blade by the edges, never by the teeth, to avoid injury. If the blade is worn out, damaged, or no longer sharp enough for your project, it’s important to dispose of it safely. Blades should not be thrown in the regular trash, as they can be a safety hazard. Many hardware stores offer blade disposal services, or you can look up your local area’s guidelines for disposing of sharp tools properly.
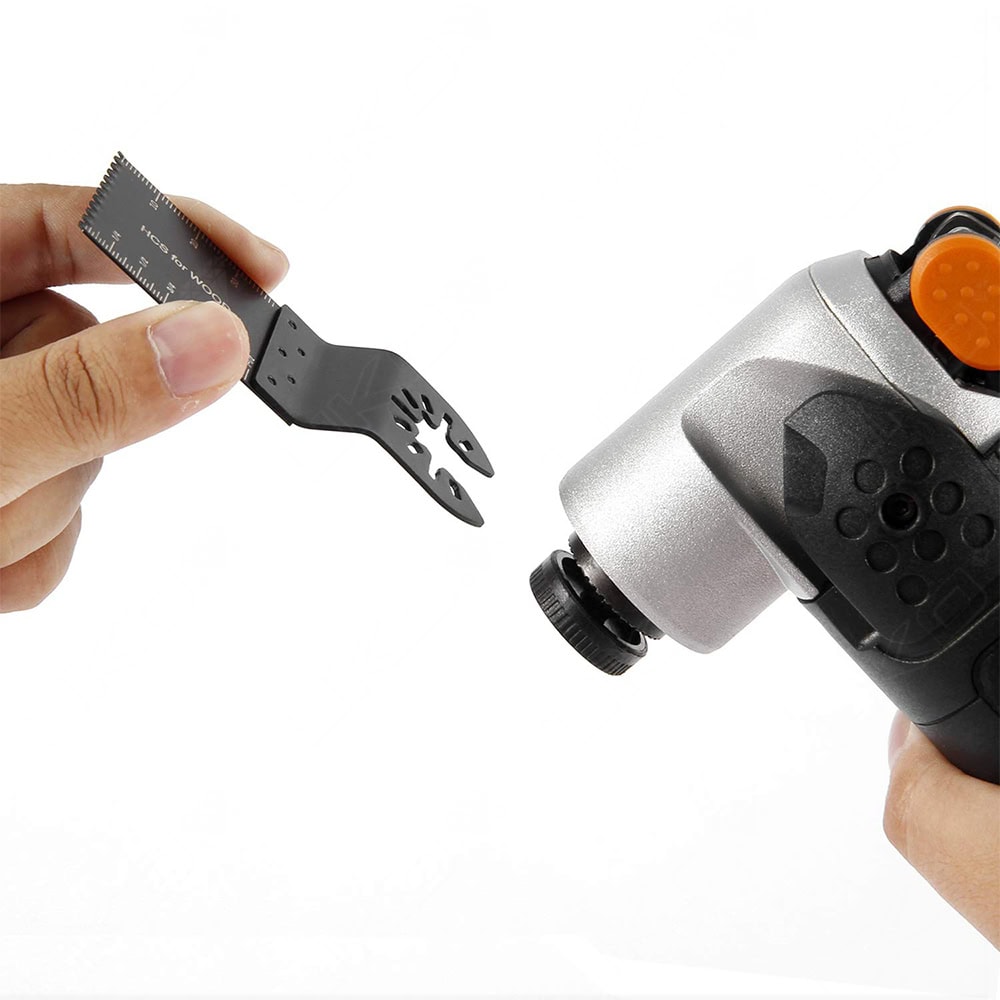
Line Up the New Blade
Take the new blade and carefully align it with the blade holder. Most oscillating tool blades have a specific shape or set of notches that must align with the tool’s holder. Make sure the blade is positioned correctly, as misalignment can cause the blade to slip out or operate improperly.
It’s helpful to check the blade’s orientation before securing it in place. Some blades have directional teeth or cutting edges that work best when positioned a certain way. Ensure that the teeth or cutting surface is facing the right direction for your job.
Lock the Blade in Place
Depending on your oscillating tool, you might need to tighten a screw, engage a locking mechanism, or push a lever into place to hold the blade securely. Make sure the blade is fully locked into the holder before moving on to avoid any accidents or the blade becoming loose during use.
Give the blade a gentle tug after securing it to make sure it is firmly in place. If the tool has a quick-release mechanism, it’s often easier to lock the blade, but for tools with screws or bolts, be sure they are tightened properly. If your tool has a knob or lever, make sure it’s fully engaged and that there’s no wiggle in the blade.
Understanding Blade Interfaces: Does It Fit Your Tool?
Changing a blade is easy, but only if the interface matches. Johnson Tools manufactures blades for all three major mounting systems:
1. The Universal Open-Back System (OIS)
- How it works: Features a C-shaped opening at the back. You don’t need to fully remove the screw—just loosen it, slide the blade in, and tighten.
- Compatible with: 95% of tools on the market, including standard Makita, Milwaukee, DeWalt, and Rockwell models.
- Our Solution: Our [Universal Fit Series] is the contractor’s choice for mixed-tool jobsites.
2. The Quick-Release System
- How it works: A lever-operated mechanism clamps the blade instantly without tools.
- Our Solution: Johnson Tools blades are precision-stamped to fit these clamp systems securely, preventing the “wobble” found in cheap generic blades.
3. The Starlock System (3D Interface)
- How it works: A bottle-cap-shaped 3D interface for maximum power transfer (found on newer Fein and Bosch tools).
- Our Solution: We offer a dedicated [Starlock-Compatible Line]. Note: Standard OIS blades will NOT fit Starlock machines, but our Starlock blades are backward compatible with some older tools.
Tired of stocking 5 different blade brands? [Switch to our Universal Series] that fits 95% of tools on the market.
Best Practices for Working with Oscillating Multi-Tool Blades
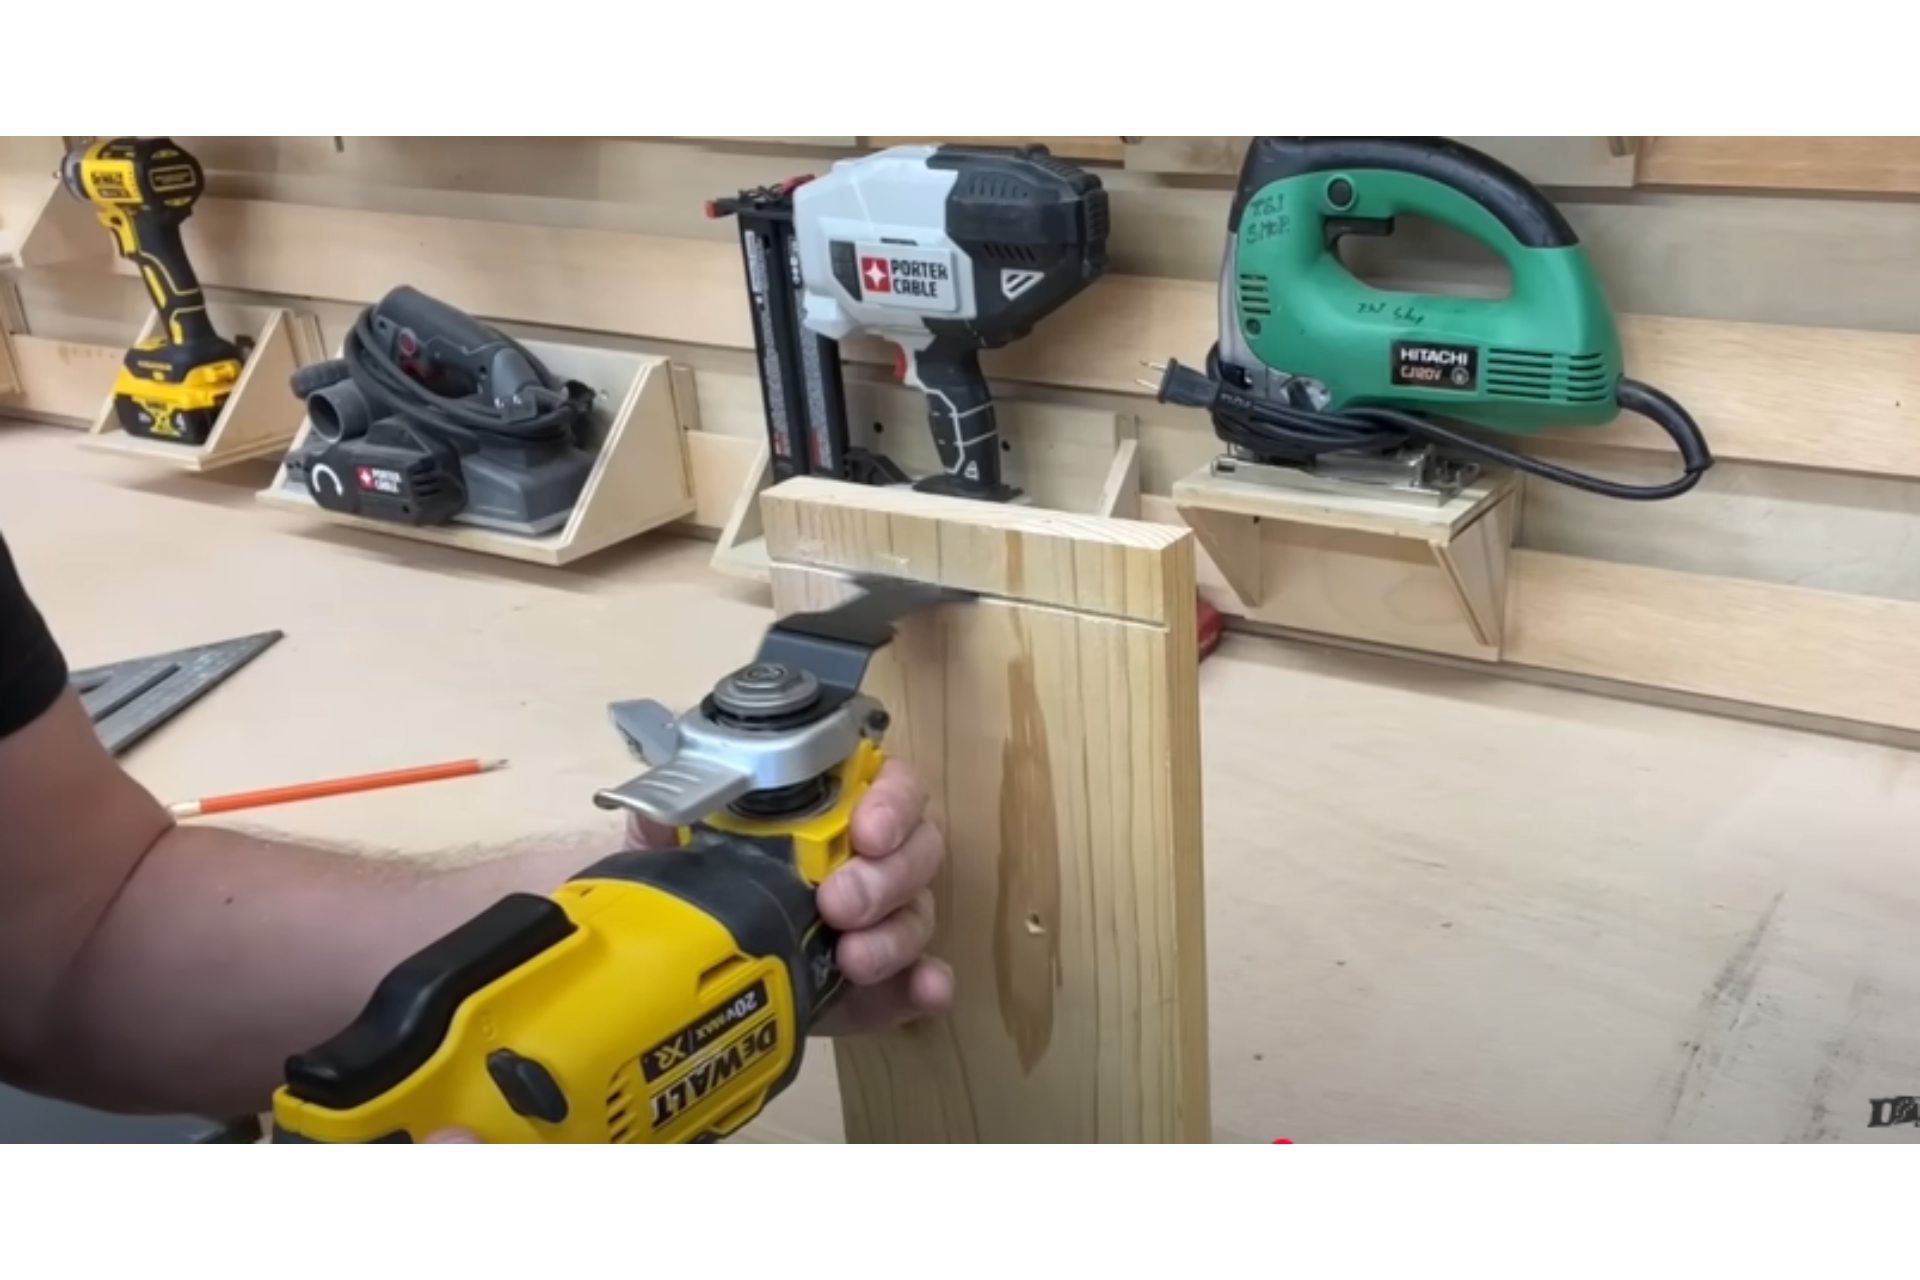
Use the Right Blade for the Right Job
Don’t use a wood blade to cut metal. Don’t use a metal blade on soft materials. Always match the blade to the job. Using the right blade not only gives better results but also keeps you safe.
Don’t Force the Tool
Let the blade do the cutting. Pressing too hard can wear out the blade or overheat the tool. Just guide it gently and give it time to do the work.
Keep Blades Clean
Dirty blades don’t cut well. After each use, clean off any wood chips, glue, or metal shavings. This helps the blade last longer. You can wipe it down with a cloth or use a brush. Just be careful of the sharp edges.
Replace Blades When Needed
If your blade looks dull, chipped, or bent, it’s time for a new one. Using a damaged blade can make your cuts messy and even break your tool. It’s better to replace the blade than risk ruining your project.
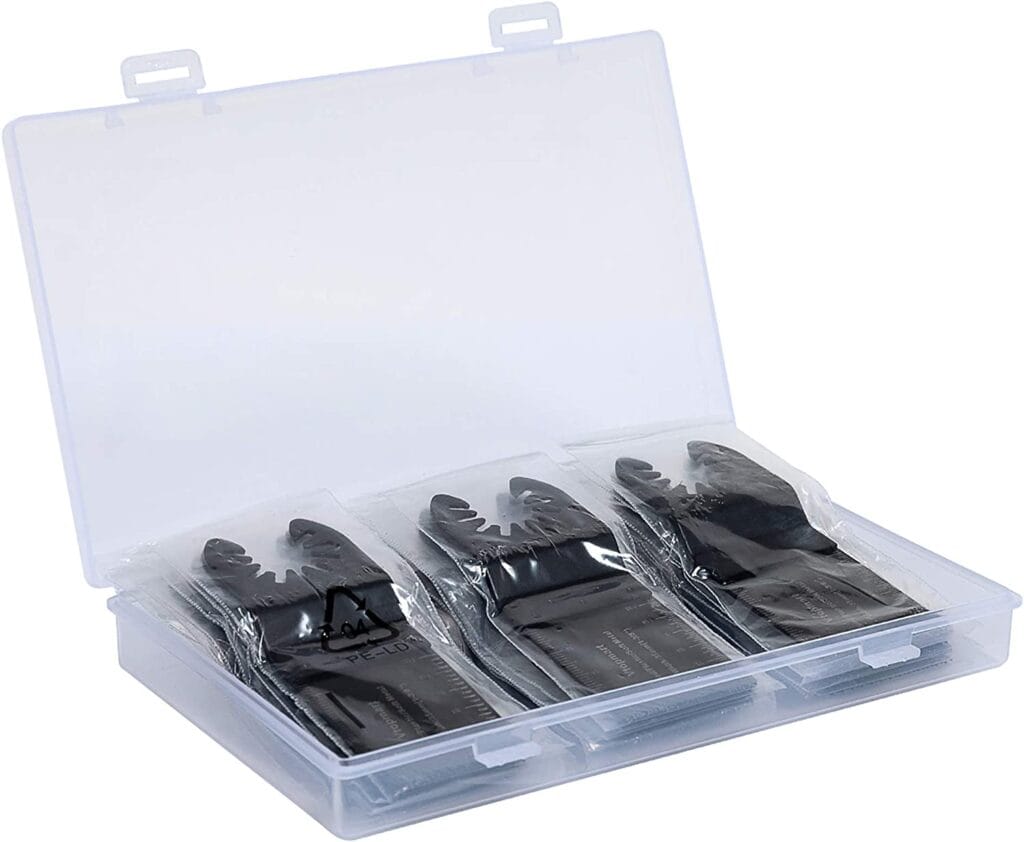
Store Blades Safely
When you’re not using them, keep blades in a box or case. This keeps them clean and prevents accidents. Never leave blades loose in a drawer or on the floor where someone could get hurt.
Troubleshooting Common Issues
- Blade Won’t Stay in Place
If your blade keeps falling out, check for dust or dirt in the locking area. Wipe it clean and try again. Also, make sure you’re using the right blade for your tool. Sometimes the problem is as simple as a loose screw.
- The tool isn’t Oscillating
If your tool isn’t moving after you change the blade, check the settings. You may have accidentally turned down the speed. Also, make sure the blade is the right type. Some blades are too heavy or thick for certain tools.
- Blade Isn’t Cutting Well
If your blade struggles to cut, check the teeth. Are they dull? Are you using the wrong blade for the material? Try switching to a new or better-suited blade. It can make a big difference.
- Trouble Changing the Blade
If the blade won’t come off or go on easily, re-read the instructions. Each tool is a little different. You can also look for videos online. Watching someone else do it can make it much clearer than just reading about it.
- Keep Your Tool in Good Shape
Check your tool regularly. Tighten screws, clean dust, and replace old parts. This keeps the tool running well and avoids problems.
Conclusion
Changing an oscillating tool blade might seem tricky at first, but with a little practice, it becomes simple. The most important steps are choosing the right blade, preparing safely, and following the instructions carefully. Once you master these basics, you’ll find your work goes faster, smoother, and with much better results. Remember, safety always comes first. So wear your gear, keep your workspace clean, and always double-check that the blade is locked in before you start cutting. With these tips, you’ll be a pro in no time. Browse our oscillating tool blades with a safe, secure checkout and get started today!
Distributors: Simplify your inventory with our ‘One-Fits-All’ oscillating blades. [Get Your Compatibility Chart & Price List]

