 Skip to main content Skip to footer
Cutting rocks may seem like a daunting task, but with the right tools and techniques, it can be manageable and precise. While tile saws are primarily used for cutting ceramic tiles, they can also be highly effective for cutting various types of rocks, especially when equipped with a diamond-tipped blade. This guide will walk you through the process of cutting rocks using a tile saw, covering everything from safety precautions to maintenance tips.
| Rock Type | Mohs Hardness | Recommended Blade Type | Pro Tip |
| River Rocks / Slates | 3 – 5 | Continuous Rim Tile Cutting Disc | Best choice for smooth, chip-free edges on landscaping stones. |
| Granite / Quartzite | 6 – 7 | Professional Wet Tile Saw Blade | Requires a soft bond diamond matrix to cut efficiently. |
| Agate / Geodes / Jade | 7+ | Thin Kerf Diamond Saw Blades | Essential for minimizing waste on premium or semi-precious stones. |
| Concrete Pavers | N/A | Segmented Concrete Cutting Disc | Best for high-speed, rough-shaping cuts. |
1. What Is a Tile Saw?
A tile saw is a motorized tool equipped with a circular blade that operates in conjunction with a water reservoir. The water flow helps to cool the blade and minimize dust during the cutting process. For rock cutting, a heavy-duty tile saw with a diamond blade is ideal, as it ensures clean and precise cuts even through harder stones.
2. Essential Safety Precautions
Working with a tile saw requires caution. Follow these safety steps to ensure a safe working environment:
- Wear Protective Gear: Always wear safety goggles, a dust mask, ear protection, and gloves to shield yourself from flying debris, noise, and dust.
- Work in a Well-Ventilated Area: Cutting rocks produces fine dust, so it’s best to work in a well-ventilated space or outdoors.
- Secure the Rock: Clamp or secure the rock firmly to prevent it from shifting during the cut.
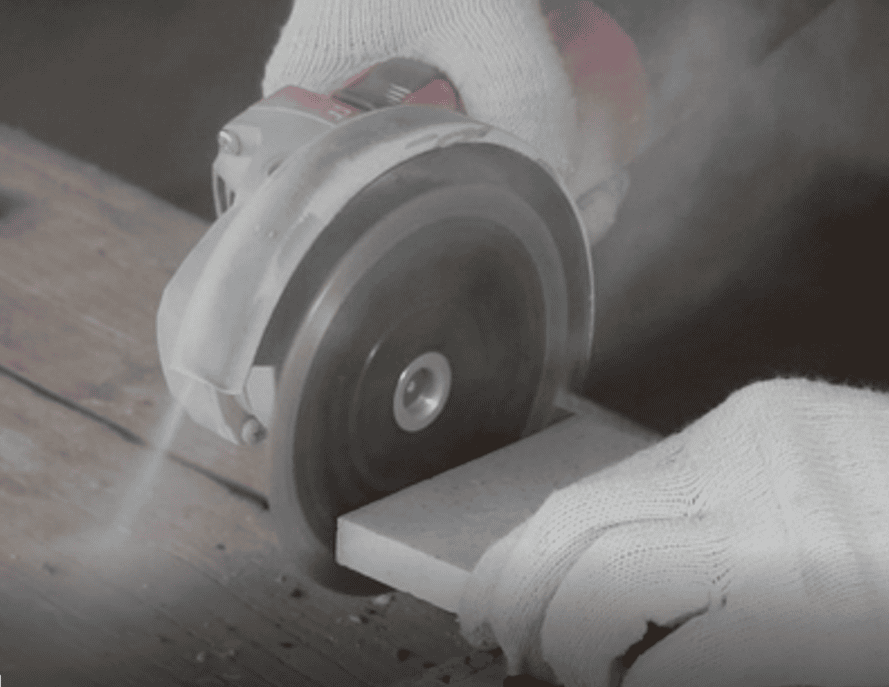
Porcelain tile cutting blade to the ultimate test.
3. Preparing for the Cut
Proper preparation ensures accurate and clean cuts. Here’s how to get ready:
- Select the Right Rock: Choose a rock that suits your project. Softer stones like sandstone are easier to cut, while harder rocks like granite require more effort and may need a more robust saw.
- Mark the Cut Line: Clearly mark the desired cutting line with a pencil or marker. Measure carefully to avoid mistakes.
- Set Up the Tile Saw: Read the manufacturer’s manual to ensure the saw is properly set up. Fill the water reservoir and adjust the blade height based on the thickness of the rock.
4. Step-by-Step Rock Cutting Process
Now that you’re prepared, it’s time to start cutting the rock. Follow these steps for an effective cut:
Detailed tutorial: How To Cut Porcelain Tile Like a Pro: Tools, Techniques & Safety Tips
Step 1: Start the Saw
Turn on the saw and ensure the water is flowing to lubricate and cool the blade.
Step 2: Position the Rock
Place the rock on the cutting table, aligning the marked line with the saw’s cutting path. Make sure the rock is firmly secured and won’t shift.
Step 3: Begin Cutting
Slowly and gently push the rock into the rotating blade, applying consistent pressure. Avoid forcing the rock through, as it may cause cracks or damage to both the rock and the saw blade.
Step 4: Keep a Steady Pace
Move the rock steadily along the marked line, ensuring that your hands remain safely out of the cutting zone. Never place your hands directly in front of the blade.
Step 5: Use a Guide
If you’re making straight cuts, use a guide or fence to ensure the rock follows the desired path. This will help maintain precision and avoid crooked cuts.
Step 6: Check the Blade Cooling
Make sure the blade remains wet throughout the cutting process by periodically checking the water level in the reservoir.
Step 7: Finish the Cut
Once you’ve completed the cut, turn off the saw and let the blade come to a full stop. Inspect the cut and make any necessary adjustments or smooth the edges with sandpaper if needed.
5. Aftercare and Maintenance
Proper maintenance will prolong the life of your tile saw and keep it in top condition for future use.
- Clean the Saw: After each use, empty and clean the water reservoir. Wipe down the saw to remove any dust or debris that has accumulated.
- Inspect the Blade: Regularly check the condition of the diamond blade. If it’s worn out or damaged, replace it to ensure efficient cutting.
- Store Properly: Store the saw in a dry, secure location, following the manufacturer’s storage recommendations.
Conclusion
Cutting rocks with a tile saw may take some practice, but by following the proper steps and safety guidelines, you can achieve precise and clean cuts. Whether you’re working on a DIY project or a professional job, this versatile tool, when equipped with the right diamond blade, can help you tackle a variety of rock-cutting tasks with ease.
By adhering to the safety precautions, preparing properly, and maintaining your saw, you can make rock-cutting projects easier and more efficient. Happy cutting!
Frequently Asked Questions (FAQ)
Q1: What is the best tile saw blade for cutting hard river rocks?
A: The best tile saw blade for porcelain and hard rocks is typically a thin, continuous rim blade with a high diamond concentration. For larger, rougher landscaping rocks, you can switch to a segmented concrete cutting disc if a perfectly polished edge is not required.
Q2: Can I use my concrete saw blades to cut rocks on a tile saw?
A: While concrete saw blades are highly aggressive, they are often too thick and aggressive for delicate lapidary cutting. For precision rock cutting, a thinner tile cutting disc is much better. However, for rough-cutting large granite blocks, a thick concrete cutting disc is highly durable.
Q3: How do I prevent my diamond saw blades from overheating while cutting stone?
A: Continuous water flow is the key. Wet cutting cools the core, lubricates the cut, and flushes out abrasive rock slurry. This prevents the steel core of your replacement tile saw blade from warping and keeps the diamonds exposed.
Q4: What should I do if my blade stops cutting but still has visible diamond segments?
A: This is called “glazing.” The metal bond has encapsulated the diamond grit. Run your tile cutting disc through an abrasive dressing stone or a soft silicon carbide block to wear away the glaze and “re-open” the fresh diamond segments. If the core is completely worn down, it is time for a replacement tile saw blade.
Featured Product: Ultimate Diamond Blade Collection for All Stone Projects

When cutting diverse natural stones, having the right tool for the specific job is essential. Johnson Tools offers a comprehensive, factory-direct hot-pressed sintered diamond saw blades collection designed to tackle any material hardness.
The Perfect Blend of Speed, Safety, and Longevity
Whether you are looking for an ultra-fine replacement tile saw blade or an industrial-grade concrete cutting disc, our diverse collection has you covered with custom specifications and multiple rim styles:
- X Mesh Turbo Rim (The Precision Specialist): Engineered as the best tile saw blade for porcelain and hard vitrified rocks. The X-mesh design provides outstanding cooling and dust removal, delivering an ultra-smooth, chip-free finish on agate, quartz, and marble.
- Turbo Rim (The Speed Master): Optimized for fast, aggressive cutting on hard granite, river stones, and bricks. This wet tile saw blade minimizes friction and cuts smoothly through highly dense materials.
- Segmented Rim (The Heavy-Duty Choice): The go-to concrete saw blades for rough shaping, block paving, and heavy landscaping stones. The wide gullets ensure maximum heat dissipation and rapid waste removal.
Technical Specifications:
- Diameter Range: 4″ to 14″ (105 mm to 350 mm) to fit angle grinders, circular saws, and wet tile saws.
- Manufacturing Technology: Premium Hot Pressed Sintered Bond for maximum segment strength.
- Compatible Materials: Porcelain, Granite, Marble, Quartzite, Basalt, and Concrete.
- Colors & Branding: Fully customizable OEM/ODM services available for bulk distributors.
[INQUIRE NOW] — Contact Johnson Tools today for wholesale pricing and let our engineers help you choose the ultimate diamond saw blades for your local market.


