 Skip to main content Skip to footer
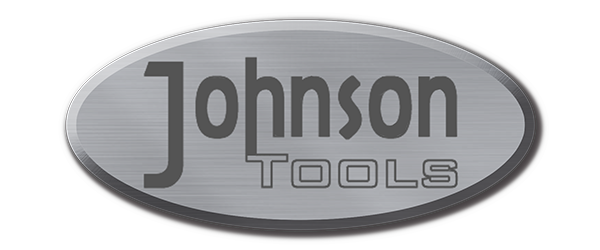

Concrete core drilling is a specialized method used to create precise, circular holes in concrete, masonry, or stone. They are often used in construction, plumbing, and infrastructure projects where accuracy is critical.
The process relies on a diamond-tipped core bit attached to a high-powered drill. Unlike traditional drills that chip at the material, diamond grit grinds through the surface smoothly.
Drilling can be done wet (with water to cool the bit and suppress dust) or dry (for faster outdoor jobs where dust is manageable). However, this technique ensures cleaner, deeper holes compared to regular drilling methods.
In this post, we’re going to help you visualize.
How to Core Drill Concrete: Step-by-Step Guide

Here is a step-by-step guide to help you make the drilling process easy and safe.
Step 1: Gather Your Tools and Safety Gear
Before you begin, make sure you have all the right tools and safety gear. You need a core drill—either handheld for smaller jobs or stand-mounted for tougher, heavy-duty projects.
Choose a diamond core bit that fits the size of the hole you need, such as a 4-inch bit for standard pipes. If you plan on wet drilling, hook up a water source to keep your bit cool. or if you’re going dry, attach a vacuum to control dust.
Remember, your safety is important. So, always wear a hard hat, gloves, impact-resistant goggles, and a dust mask. It’s also wise to use ear protection because core drills can be quite noisy.
Step 2: Mark and Secure the Drilling Area
Next, take a moment to clearly mark your drilling spot with chalk or a pencil. Make sure that the area is free from hidden pipes, wires, or rebar. Use a stud finder or check your blueprints to confirm you’re in the right spot.
Once you’ve marked the spot, secure the drill firmly to the surface. Stand-mounted drills usually need anchor bolts or a vacuum base for stability, while if you’re using a handheld drill, hold it with a firm grip. Clear away any obstacles to ensure that your drill won’t slip during the job.
Step 3: Set Up and Check Your Equipment
Before you start drilling, take the time to set up your core drill properly. Check that your drill’s settings are correct and that the water hose or vacuum attachment is securely connected.
This step will help you avoid problems during the drilling process. Also, make sure the drill bit is in good condition, and adjust your machine’s speed according to the type of concrete you’re working with.
Step 4: Create a Guide Groove
Now, begin drilling at a low speed to create a guide groove on the surface. The initial groove acts like a pilot line that helps you maintain accuracy.
It is especially important when you are dealing with floors or walls made with thick or reinforced concrete. Taking your time during this stage can help prevent the drill bit from wandering off the mark.
Step 5: Increase the Drill Speed Gradually
Once you’ve established a clear groove, slowly increase the drill speed. For softer materials like brick or lightweight concrete, you can safely boost the speed.
However, if you’re drilling through tougher, reinforced concrete, maintain a moderate pace to ensure that you don’t overheat the bit. Always let the drill’s weight and steady pressure do the work; avoid forcing it as this could damage your equipment.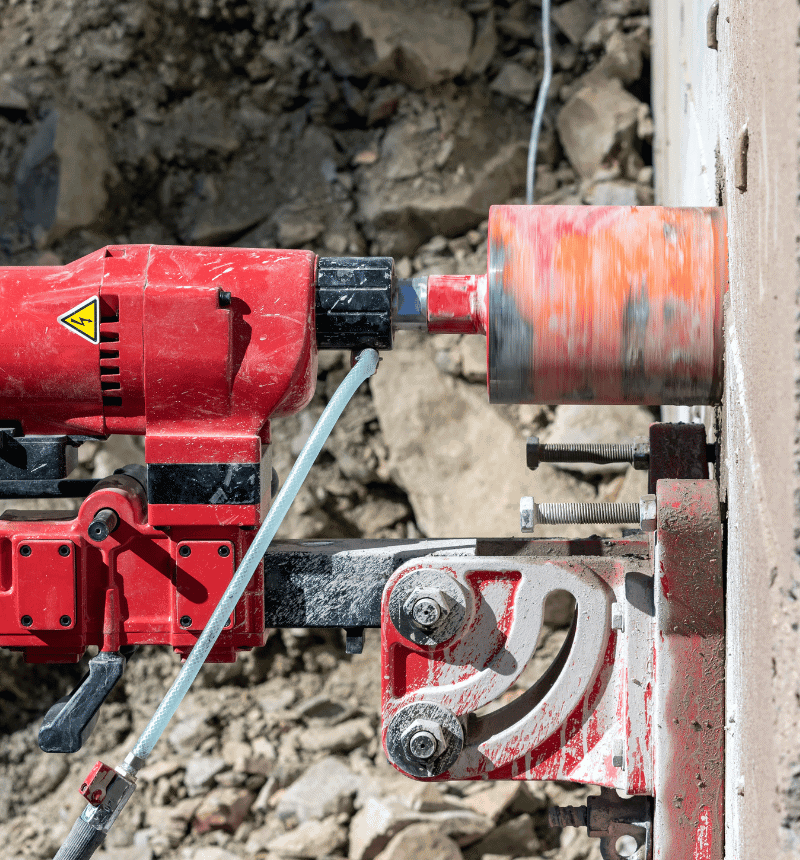
Step 6: Monitor Progress and Clear Debris
As you drill, keep an eye on the process. If you notice that the drill slows down or starts to bind, it’s time to stop and lift the drill slightly. This helps clear any debris that has built up around the bit.
If you’re wet drilling, ensure the water flow continues to flush out dust and debris. Taking these breaks when needed will help extend the life of your drill bit and maintain a smooth drilling process.
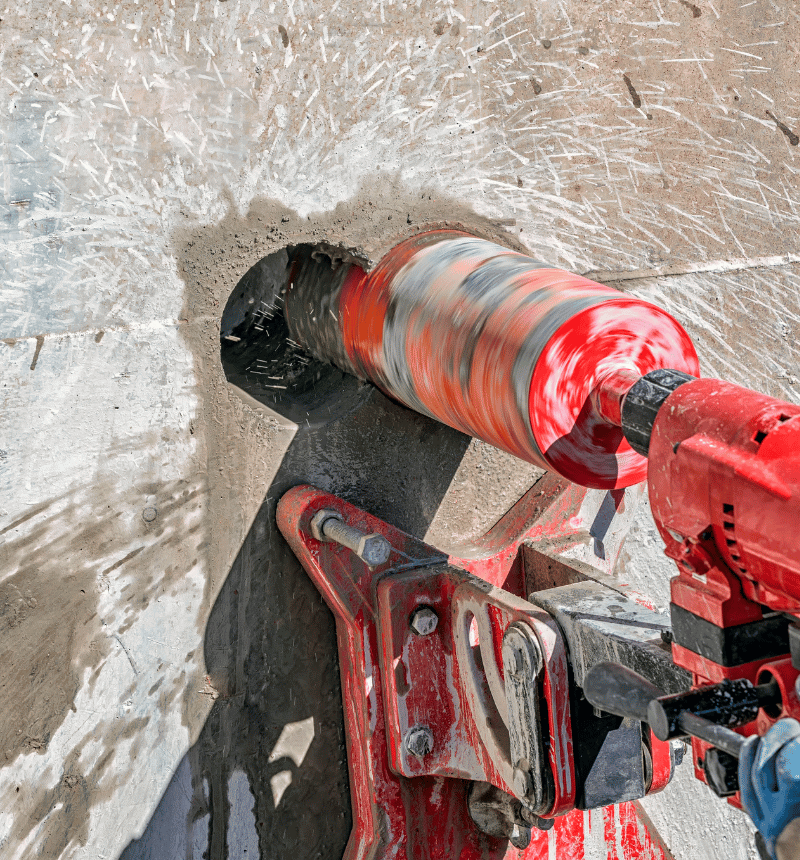
Step 7: Complete the Drilling and Remove the Core
Once you have drilled through the material and completed the hole, turn off the drill and let the bit cool down naturally.
Gently wiggle the concrete core a bit to loosen the concrete plug from the inside of the hole. Carefully remove the concrete core without leaving behind any debris. By doing so, you’ll get a clean finish and ensure that the hole is ready for any subsequent work, such as installing pipes or cables.
Step 8: Smooth the Edges and Clean Up
After you’ve removed the core, examine the edges of the hole. If they are rough or uneven, use a grinding wheel or a chisel to smooth them out.
This not only improves the appearance and efficiency of the hole but also makes future installations easier. Once you’re done, clean your tools and drill thoroughly to remove any remaining dust and debris. Store your equipment properly to keep it in good condition for your next job.
Pro Tips for Success
- Rent a stand-mounted drill for holes deeper than 6 inches—it offers better control.
- Always check the bit for wear and tear before starting a project.
- For indoor projects, wet drilling is safer and cleaner.
Types of Concrete Core Drill Bits & When to Use Them
When you start a drilling project, one of the most important decisions you’ll make is choosing the right drill bit. Different types of bits are designed for different materials and job requirements. And using the right one can make your work easier, safer, and more effective.
Let’s look at the three main types of concrete core drill bits and when you should use them.
Diamond Core Drill Bits – Best for Heavy-Duty Projects
Diamond core drill bits are the go-to choice when you’re working with tough materials like reinforced concrete, stone, or masonry.
How do they work? These bits have a diamond-coated edge. They grind through concrete rather than cut it. The process creates a cleaner, smoother hole. If you’re a professional or working on a project that requires high precision and durability, you should consider using diamond core bits.
Recommendations
A popular pick among experts is the BLUEROCK Diamond Core Drill Bit Set. This set comes in various sizes, usually ranging from 2 inches to 6 inches, so you can choose the right bit for your specific needs.
When you use a diamond bit, you get a longer-lasting tool and one that can handle the intense friction and heat generated during drilling. These bits may be more expensive, but they work efficiently and perform well. The extra cost is worth it on tough projects.
Carbide-Tipped Core Drill Bits – Great for Lighter Work
Carbide-tipped core drill bits are great for lighter jobs. They work well for drilling into cinder blocks and non-reinforced surfaces. These bits have a tip made from carbide, which is a very hard material that can cut through light concrete effectively.
For DIY projects or small jobs, carbide-tipped bits are a budget-friendly choice that still performs well. Many users favor the Bosch Carbide Core Bit for its durability and cost-effectiveness.
Although carbide bits are not as robust as diamond bits when it comes to heavy-duty construction tasks, they perform well in the right conditions. They can be a practical choice for less demanding construction jobs.
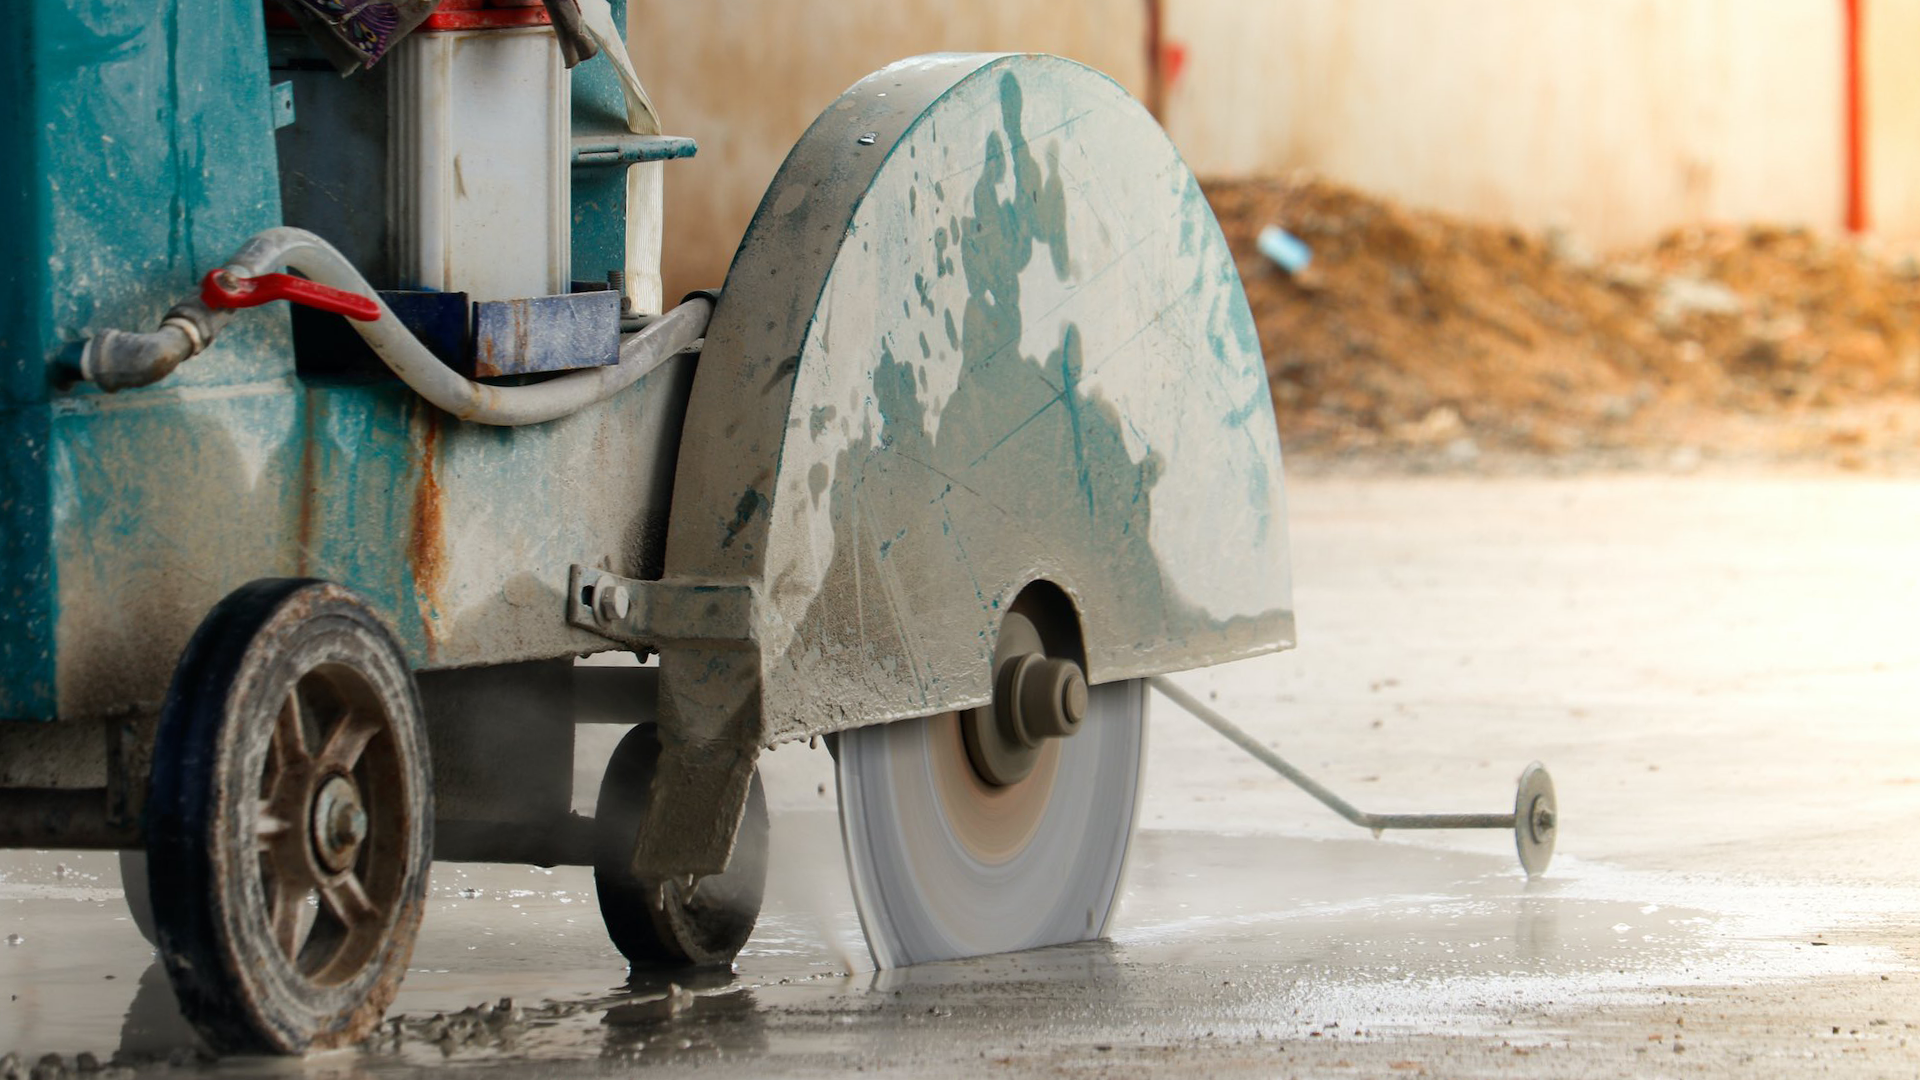
Wet vs. Dry Core Drill Bits – Choosing the Right Environment
Another key decision you’ll face is whether to use a wet or dry drilling technique.
Drilling Reinforced Concrete: When to Choose Wet vs. Dry Core Bits?
Wet core bits
Wet core bits are designed to work with a continuous water flow that cools the bit and flushes out debris. They help prevent overheating, extend the life of the drill bit, and reduce dust significantly.
For these reasons, if you’re drilling outdoors or in an environment where managing dust is a priority, you should opt for wet drilling. The Hilti DD-BI Diamond Core Bit is a top choice for wet drilling. It cools well and performs strongly with continuous water flow.
Dry core bits
On the other hand, dry core bits work without water. They are often chosen for indoor projects where moisture can cause problems. While dry drilling is more convenient in these settings, it tends to create more dust.
To mitigate this, you should use a vacuum attachment to capture the dust as you work. The DeWalt Dry Diamond Core Bit is a great option for dry drilling. It works well even without water cooling.
With dry bits, you need to be extra cautious about dust control, so always have a plan for cleanup and proper ventilation.
Choose your drill bit based on the type of concrete and the drilling environment. Your choice between wet and dry drilling will depend on whether you can manage the water supply or need to control dust indoors.

For Delicate Materials Like Glass or Tile
If your project involves drilling through glass, ceramic, or porcelain, switch to a specialized Diamond Glass Drill Bit. These bits feature a finer diamond grit to prevent cracking and ensure clean, polished edges on fragile surfaces.
Best Concrete Core Drills for Professionals & DIYers
When you’re choosing a core drilling machine, pick a tool that fits your specific needs, whether you’re a professional or a DIY enthusiast.
Choosing the Right Drill for Concrete
Heavy-duty projects
For heavy-duty projects, professionals often rely on the Hilti DD 200 Core Drill Machine. It is designed to handle deep holes in reinforced concrete with ease. Also, it maintains power and precision, which is essential for projects where accuracy is critical.
Another top choice for professionals is the BLUEROCK Z-1 Core Drill. This core drilling machine is versatile enough for both wet and dry drilling in masonry. This is why it is a reliable option when you need to switch between different types of materials or drilling methods.
Small projects
If you’re doing home renovations or small projects, there are great DIY options available. The Bosch GDB 2500 Core Drill is a compact model that is perfect for home projects. It’s easy to handle and provides the right balance between power and portability.
If mobility and efficiency is a key factors, consider the DeWalt DCD130B Cordless Core Drill. Its cordless design gives you more power and the freedom to move around and work in different locations.
With these top picks, you can be confident in your accuracy and achieve clean, precise holes every time.
Common Problems & Solutions When Core Drilling Concrete

- Overheating
When you’re core drilling, you might run into a few common issues. One problem you might face is your drill bit overheating. It happens when the drill is working too hard or for too long without proper cooling. The best solution is wet drilling. Water cools the bit and stops heat buildup. This helps the bit last longer.
- Ineffective Cutting
Another issue is when the drill isn’t cutting into the concrete effectively. If you notice this, check to see if your drill bit is dull or clogged with debris. A dull or dirty bit will struggle to make a clean cut, so make sure to replace or clean it regularly.
- Using the Wrong Drill
Remember, you can’t use a regular drill for core drilling concrete. Standard drills lack the necessary power and torque required for this kind of work. So, always use dedicated core drilling machines.
- Excess Dust
Dust can also become a problem, especially during dry drilling. To cut down on dust, attach a vacuum to the drill. You can also switch to wet drilling, which helps reduce dust naturally.
Taking these simple steps will help you work more efficiently and maintain a safer, cleaner work environment.
Conclusion: Choosing the Best Core Drill & Bit for Your Project
When you set out to core drill concrete, choosing the right drill, bit, and technique is key.
Diamond core bits are the best choice for heavy-duty work. They are strong and precise, which helps you get accurate and efficient results for the next project.
Wet drilling is usually preferred. It keeps your bit cool and cuts down on dust. This method creates a cleaner, safer work environment.
Investing in a high-quality core drilling machine makes a big difference. Good tools help you work faster and avoid mistakes, whether it’s for a job or a DIY project. With the right tools and careful attention, you can handle any core drilling project with confidence.
Call to Action
Looking for trusted tools, accessories, and expert solutions to boost your drilling projects? Explore the innovative products available at Johnson Tools. With the right equipment and care, you can achieve outstanding results every time.
Frequently Asked Questions (FAQ)
- Q: Why is my diamond core bit cutting so slowly in reinforced concrete?
- A: You are likely using a bit with a hard metal bond. Reinforced concrete requires a soft-bond diamond core bit so the matrix can wear away properly, constantly exposing fresh, sharp diamonds to cut through the steel rebar.
- Q: Can I use a wet core drill bit without water?
- A: No. Wet core bits are brazed or laser-welded with the assumption of water cooling. Running them dry will melt the segments off the steel barrel almost instantly.
- Q: Do you offer custom or OEM diamond core bits for distributors?
- A: Yes, we specialize in manufacturing high-performance diamond tools. We offer OEM branding, custom segment formulations (like A-roof or turbo segments), and various thread connections (e.g., 1-1/4″ UNC, 5/8″-11) for wholesale buyers.

