 Skip to main content Skip to footer
Old, cracked, or stained grout can make your tiled surfaces look awful, making them appear dull and unkempt. The removal of the old grout is the first step in a full home renovation or revamp, whether on a big or small-scale renovation project. Here, you will learn how to handle grout removal using the most effective methods that will not damage your precious porcelain tile.
Although simply spreading a tiling adhesive will almost always work, an oscillating tool will outperform the rest, ensuring that it is a quick, straightforward process for both novices and professionals.
Best Tools for Removing Grout
The right tools can shorten the process when it comes to removing old grout. Depending on the tool’s complexity and efficiency, you may choose any of the tools below.
Maximize Your Oscillating Tool’s Performance
The machine is only as good as the blade you put on it. Whether you use a Fein, DeWalt, or Milwaukee tool, Johnson Tools offers the perfect blade solutions to upgrade your efficiency:
- For Professionals (Heavy Duty): Johnson Tools Titanium-Coated Blade Series – Designed for contractors who need long-lasting durability. These blades reduce heat buildup, making them the perfect match for cordless tools (like Milwaukee M18) to extend battery runtime.
- For General Construction & DIY: Johnson Tools Universal Starter Kit – A versatile set compatible with 95% of oscillating tools on the market (including Quick-Release systems). It offers the best balance of price and performance for everyday tasks.
Manual Tools for Grout Removal (Budget-Friendly)
Manual tools for grout removal are disadvantageous in some aspects. However, they are preferable when handling small repairs in tight spots. They include:
- Grout saw: It provides an abrasive blade suitable for grout lines that connects to a hand-held tool, making for a cheaper alternative. It is ideal for a smaller section that is cheap, with the disadvantage of being labor-intensive for a job.
- Grout Rake: It is suitable for intricate labor such as some grime cleaning and removal of grout lines for minor repairs.
- Utility knife or chisel: Suitable for tight, uncomfortable spaces, little or out-of-reach accessible to a tool blade. This method is exhaustive due to the cutting-edge, causing tile damage.
Dealing with tough epoxy grout? Don’t burn through boxes of cheap blades. [Request a Sample] of our long-life Diamond Series.
Why Use an Oscillating Multi-Tool for Grout Removal?
The oscillating multi-tool has become a popular tool because it has numerous advantages over other power tools. First, because of its oscillating motion and rapid blade movement, it cuts through the grout quickly. Second, it is more accurate compared to the angle grinder because it has a smaller blade. Consequently, the tool does not break tiles, unlike other power tools, due to its vibrational nature. Finally, the blade is less likely to ruin the tile and works perfectly in tight areas and corners.
Step-by-Step Guide: How to Remove Grout with an Oscillating Tool
When using an oscillating multi-tool, removing old grout may be a fast process if done correctly. The following instructions will assure the smooth running of your grout removal project.
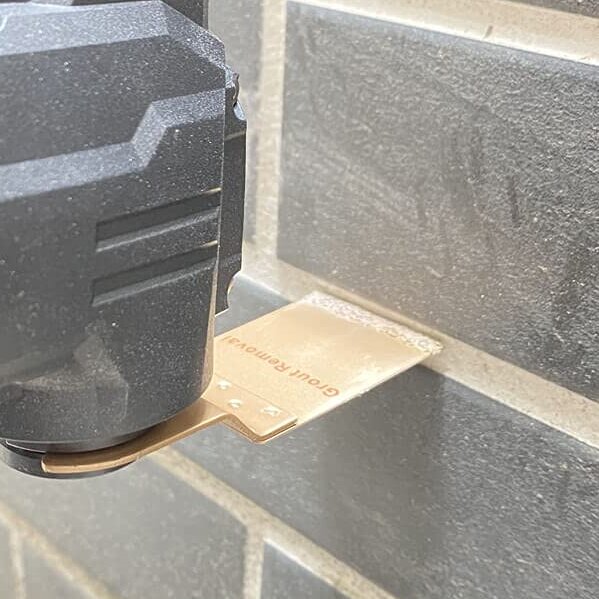
Step 1: Gather Your Tools & Safety Gear
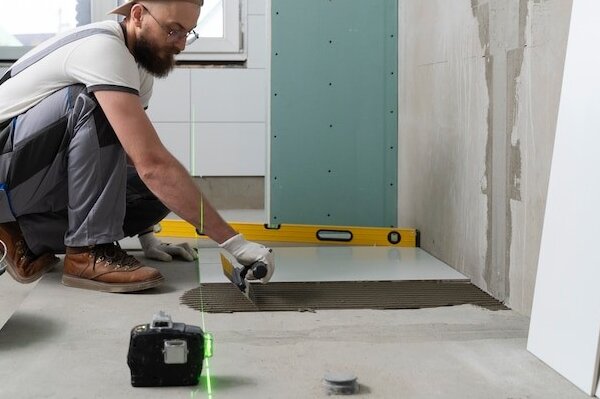
First, you must gather the tools required for this job. These are an oscillating multi-tool, a dedicated grout removal tool, safety gear, a vacuum brush, and a respirator/dust mask. The oscillating multi-tool might be corded or cordless.
A carbide grout removal blade matches your requirement, while a diamond-coated blade is more suited to thick surface grouts for hard grout and a lot of time. The safety gear includes safety glasses, gloves, and a respirator/dust mask. A vacuum brush may be required as working over a vacuum while removing the debris prevents the work surface from becoming a mess.
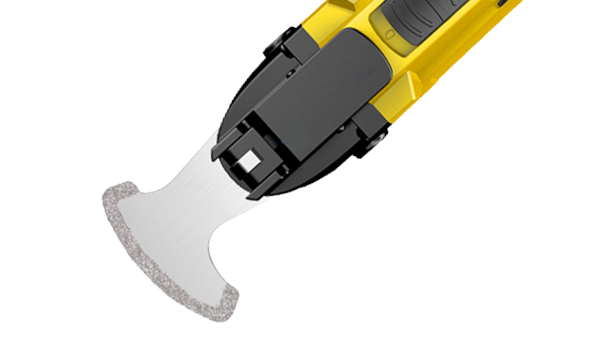
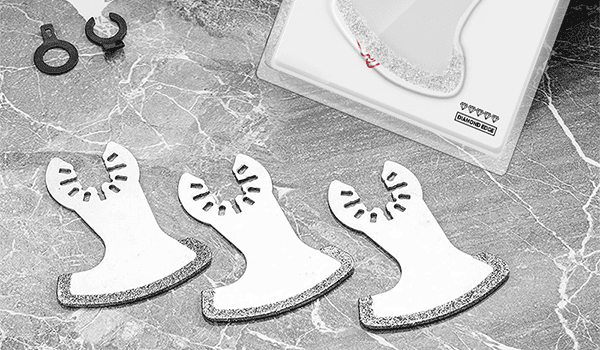
Step 2: Install the Right Grout Removal Blade
Select the appropriate tool for grout removal. The process is dependent on the blade, so take time to choose the right one for the job. A carbide blade should be used to scrape away the grout.
It works well in removing standard ceramic tile grouts since it is hard and grinds them up. Epoxy grout and high-strength or old cement grout would necessitate you to use a blade with a diamond grit to remove the grout on the floor with ease.
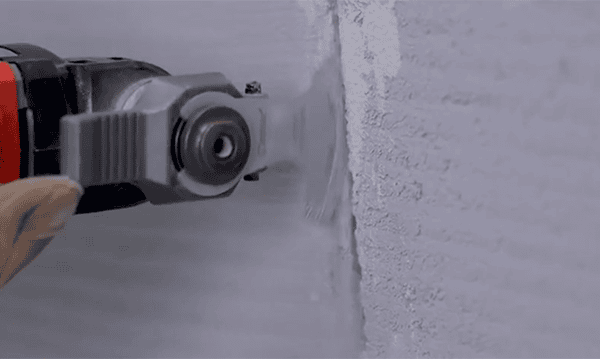
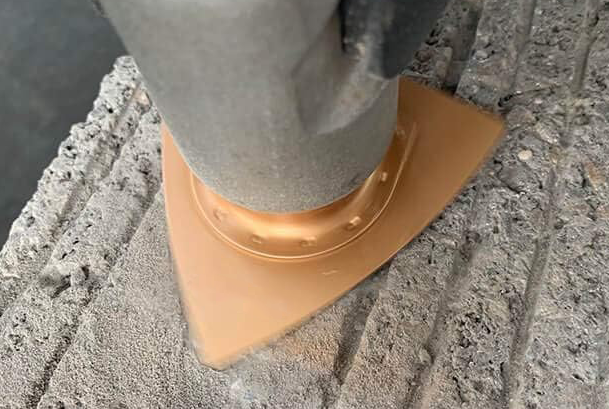
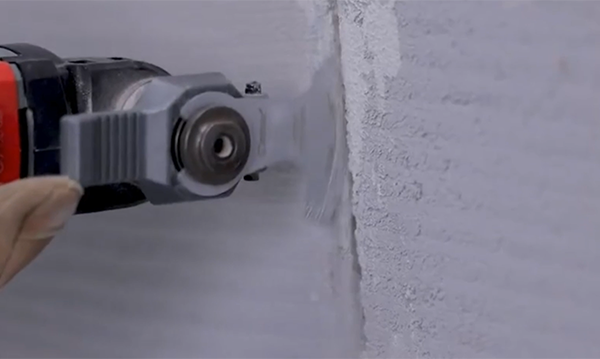
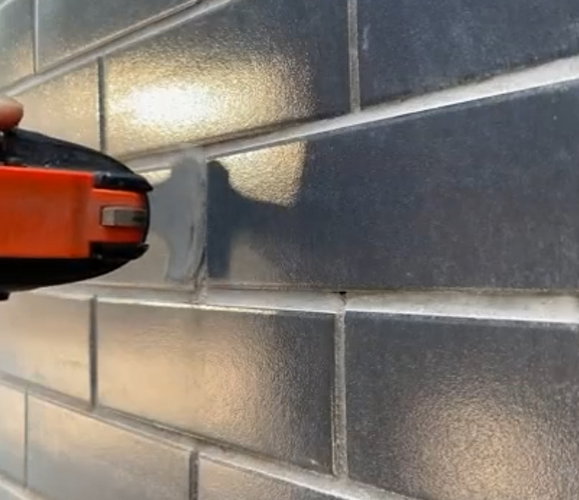
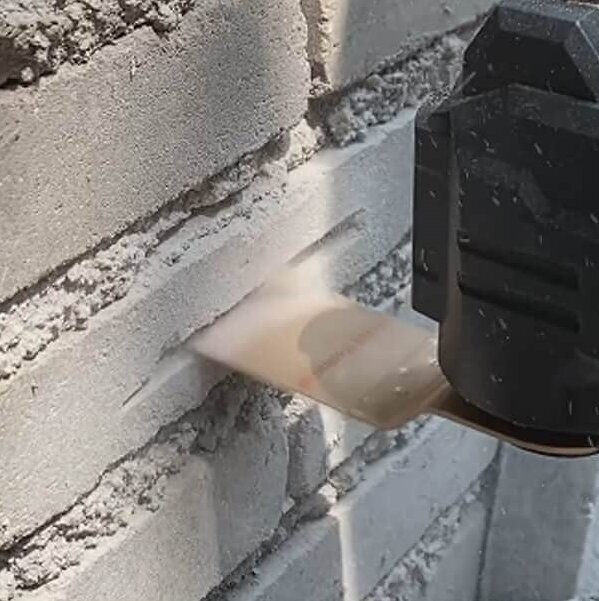
Step 3: Start Cutting the Grout
Before starting to cut the grout, wear your safety gear and properly adjust the blade. Setting your oscillating tool to a medium speed is paramount for the best balance of cutting power and control. This will keep you from overheating the blade or causing it to jump.
Keep the tool at a slight angle rather than flat against the tile. This will help the blade to bite into the grout line more effectively, allowing you to control the tool better and see the line more clearly as you cut.
As you slowly and steadily move the blade along the center of the grout line, gently applying continuous pressure, make sure to let the tool do its job as you guide it to cut through the grout into dust.
For large grout lines, you may need multiple passes to continue until all of the old grout has been removed. After the removal tool has accomplished its primary mission, you’ll be left with some stubborn pieces and a thin layer of grout dust in all the channels.
Step 4: Remove Remaining Grout Fragments

For this step, use a grout rake or a small, stiff scraper, gently scraping any pieces the removal tool left behind or couldn’t quite dislodge from the base of the grout line.
Once everything has been loosened, vigorously vacuum the entire area. This is to help you keep the workspace clean for a clear vision and help determine what areas need a bit more work.
Step 5: Inspect & Prepare for Regrouting
The final step is to inspect the newly cleared grout lines and prepare for fresh grout. With the old grout now gone, inspect closely for any loose or cracked tiles and replace them as necessary. Before sealing and regrouting, gently tap each tile; a hollow sound indicates a loose tile, which must be resecured before proceeding with new grout.
This step also enables you to identify chips or cracks in the tiles themselves. Finally, wipe the area down with a damp cloth to remove any spread fine dust. Ensure the area is completely dry before grouting to ensure proper adhesion.
Oscillating Tool Grout Removal: Best Blades & Accessories
Choosing the right blades, and even an oscillating multi-tool, is essential for a successful grout removal process. Let’s look at the best tools and accessories for your next project.
Maximize Your Oscillating Tool’s Performance
The machine is only as good as the blade you put on it. Whether you use a Fein, DeWalt, or Milwaukee tool, Johnson Tools offers the perfect blade solutions to upgrade your efficiency:

- For Professionals (Heavy Duty): Johnson Tools Titanium-Coated Blade Series – Designed for contractors who need long-lasting durability. These blades reduce heat buildup, making them the perfect match for cordless tools (like Milwaukee M18) to extend battery runtime.
- For General Construction & DIY: Johnson Tools Universal Starter Kit – A versatile set compatible with 95% of oscillating tools on the market (including Quick-Release systems). It offers the best balance of price and performance for everyday tasks.
Alternative Methods: How to Remove Grout Without an Oscillating Tool
Other methods can be considered depending on the scope of the project and the requirements. First, Rotary tools like a Dremel-style offer ultimate control when you want to be doing an intricate job, but they are slow compared to an oscillating multi-tool.
An angle grinder equipped with a diamond blade is the speediest option for large tiled areas. This method requires extreme caution to avoid wreaking havoc on your tiles, as it cannot be equivalent to an oscillating multi-tool. For detailed but inexpensive work on tedious jobs or when the budget is the greatest consideration, the manual grout saw.
Common Problems & Solutions in Grout Removal

Despite having the right tools, problems may still be present. These include;
- The oscillating tool is scratching the tile. If this happens, remember that oscillating tools have grout removal guide attachments to aid in maintaining a consistent depth. Do the removal job quietly and keep the oscillating blade at a shallow angle.
- The blade is wearing out too fast. Standard carbide blades are great for ceramic tile grout, but tougher materials like epoxy grout will quickly dull them. You should invest in a high-quality diamond-coated blade. They’re significantly more durable and steeped in longevity and efficiency, and designed for the toughest grout.
- Too much dust while removing grout. Cutting and removing grout generates a lot of fine dust, some of which may be hazardous to your respiratory system and a mess to clean up later.
- If your oscillating tool is equipped with a vacuum attachment, be sure to use it: many models come with ports for dust extraction. If you notice that your tool is getting dusty before you saw it, mist the grain lines lightly before cutting. Mist helps bind the dust, but don’t overdo it, particularly around electrically powered tools. A dust mask should be worn in all situations.
Safety Tips for Grout Removal
Although grout removal is a popular DIY project, it is important to practice it securely to avoid injuries. First, you must always protect your eyes from flying grout dust and debris with safety glasses. Ear protection, which safeguards your hearing from power tool harm, is essential.
To avoid inhaling fine grout particles, your workspace should be well-ventilated. You may open windows and activate fans to get fresh air circulation. Finally, when using the tool, don’t go too fast. Instead, allow the blade to move the way it was meant to. You might lose control, risk damaging tiles, or cause the blade to wear out prematurely if you push down too hard.
Frequently Asked Questions
Can I remove grout without power tools?
Grout saws and rakes are equipped for use without the requirement of power equipment. For individuals working in limited regions or who prefer not to employ labor-saving devices, it is feasible. However, much effort is required, and it takes a longer time to guarantee accuracy.
What is the fastest way to remove grout?
The quickest possible with an oscillating multifunction tool is available with a carbide or diamond grit. Moreover, the angle grinder moves quickly and effectively in wide spaces but must be carefully supervised.
Which grout removal tool is most beneficial for novices?
Because of the minimal risk of degrading tiles, newbies find it easier to remove cement from between the tiles manually. If a power tool is employed, the oscillating multi-tool attachment is more flexible.
How to avoid scraping tiles while removing grout?
Precision is the only answer. To select the ideal blade fitting for the type of grout you are working with, work gradually and slowly. Grout removal attachments may be utilized for manual equipment to retain tile edges.
Conclusion
The oscillating multi-tool is the greatest option for fast and suitable grout removal. The unique vibration motion provides quick, precise, and straightforward use that cannot be matched for obtaining simple, efficient grout removal. Always get the appropriate grout elimination attachment for your grout kind, and obtain a carbide or a diamond blade for the epoxy grout in order to guarantee you can accomplish the mission. Choose the right grout removal tool that best fits your requirements and enjoy the best results!
Looking for a reliable supplier of tile renovation tools? Get factory-direct pricing on premium grout removal blades. [Download Our 2026 Wholesale Catalog]


