 Skip to main content Skip to footer


For professional masonry contractors and restoration specialists, repointing brick and stone is a heavy-duty operation where time is money. Using a standard cutting disc for mortar removal leads to sluggish grinding, rapid blade wear, and potentially costly damage to historic masonry.
To maximize your team’s efficiency and secure the best return on investment for your consumables, you need specialized tuck point diamond blades engineered to withstand highly abrasive environments. This guide breaks down the technical specifications, blade designs, and sizing requirements you need to know when upgrading your mortar removal toolkit.
What is tuckpointing?
Tuckpointing is a masonry restoration method that strengthens the deteriorating mortar and the brickwork. Over time, the weather and moisture eliminate the mortar holding the bricks together. If left untreated, cracks are formed, allowing water to leak and weaken the structure.
Tuckpointing removes the old mortar and fills the joints with fresh, durable materials. This process prevents further damage and increases the life of masonry and its visual appeal. It is widely used to restore historical buildings, maintain commercial properties, and strengthen residential brick walls.
How it works
The tuck-pointing process begins by removing the old, collapsing mortar from the middle of the bricks. This uses a tuck point blade, eliminating weak material without damaging the surrounding bricks. Once the joints are cleaned, fresh mortar is packed in intervals. This step strengthens the structure and prevents moisture from leaking.
A thin line of opposite mortar is applied to joints for a sophisticated finish. This line creates an accurate, uniform brickwork, which makes the surface look well-maintained and aesthetically pleasing. When done correctly, the pointing restores the integrity of masonry and protects it from long-term structural issues.
Choosing the best tuck point blade for masonry
The selection of the right tuck-point blade is essential for effective tuckpointing. The wrong blade can slow you down or damage the brickwork. A high-quality tuckpointing blade helps remove the old mortar quickly and cleanly, making the restoration process smooth. Different projects require separate blade types, so it is necessary to understand their characteristics.
What is a tuck point blade?
A tuck point blade is a unique diamond blade designed to cut through old mortar. It fits on an angle mill, allowing you to grind the deteriorating mortar without damaging the bricks. Since mortars vary in the size of the joints, the tuckpointing blades come in different thicknesses. Choosing the correct width removes it efficiently while maintaining the structure’s integrity.
| Blade Type | Segment Design | Best Application | Cutting Characteristic |
| Standard Tuck Point | Single thick segment (e.g., 1/4″ or 3/8″) | General mortar removal & brick repointing. | Extremely durable, consistent grinding. |
| Sandwich Tuck Point | Dual/Triple parallel blades | Hard mortar & high-volume restoration jobs. | Faster cutting speed, efficient dust clearing. |
| V-Crack Chaser | V-shaped continuous or segmented | Repairing random cracks in concrete & masonry. | Creates clean, wedge-shaped grooves for sealant. |
Types of tuck point blade
Let’s look at the three common types of tuck point blades for businesses and DIY projects.
Single-blade tuck pointers
A single-blade tuck pointer is ideal for narrow joints. It provides accurate control and works well for delicate masonry repair. A dual-blade tuck pointer is better if you need to remove a large amount of mortar quickly.
Moreover, it grinds wide joints efficiently, saving time on large projects. It has deep, space-out segments that reduce heat build-ups aggressively. This tuck-point blade lasts long and works well on thick, stubborn mortar.
Dual-Blade Tuck Pointers
A dual-blade tuck pointer gives the speed of mortar removal in large joints. It grinds the material quickly, reducing labour time. These blades are excellent for high-length tuckpointing projects where efficiency is essential. Pair it with a powerful mill for the best results.
Fragmented diamond tuck point blade
The correct tuckpointing blade depends on the project. If precision is necessary, go with a single-blade option. For speed, a dual-blade is the best. When reliability matters, a tuck-point diamond blade gives long-lasting results.
Matching Blade Thickness to Your Masonry Joints
Using a blade that is too thin requires multiple passes, wasting labor time. Using a blade that is too thick will damage the surrounding brickwork. Always measure the mortar joint before selecting your blade kerf (thickness):
- 1/4″ (6.4mm) Thickness: The industry standard for modern brickwork and narrow mortar joints.
- 3/8″ (9.5mm) Thickness: Ideal for older, historic masonry, cinder block walls, and wider stone joints.
- 1/2″ (12.7mm) Thickness: Reserved for very wide stone foundations and specialized heavy routing.
Best tuck point for masonry diamond blade
| Truck Point Blade | Best For | Recommended Product |
| Bosch 4.5-Inch Diamond Tuck Point Blade | Small brick repair jobs | Bosch Premium Tuck Point Blade |
| DEWALT XP Tuck Point Diamond Blade | Fast removal of wide mortar joints | DEWALT XP 4.5-Inch Tuckpointing Blade |
| Makita 7-Inch Segmented Tuck Point Blade | Professional masonry work | Makita Diamond Blade for Tuckpointing |
| Hilti SPX Masonry Tuck Point Blade | Deep, precision mortar cutting | Hilti SPX 5-Inch Tuck Point Blade |
How to Tuck Point Brick & Masonry (Step-by-Step Guide)
Tuckpointing calls for the proper equipment and protection gear. Without them, you risk mistakes or, even worse, injuries. Before starting, gather all the standard tuckpointing tools needed to work efficiently.
Step 1: Gather Your Tools & Safety Gear
Typically, you’ll need an angle grinder with a tuck-point diamond blade. This tool eliminates vintage mortar speed. Additionally, a masonry chisel and hammer help with finer modifications. A tuckpointing trowel smooths the brand-new mortar into the vicinity
. However, remember to use a nice mortar mix for sturdiness. Always wear gloves, goggles, a dirt mask, and knee pads. Safety is essential whilst running with masonry tools. You can look for local trade terminology when looking for some tools to find them easily.
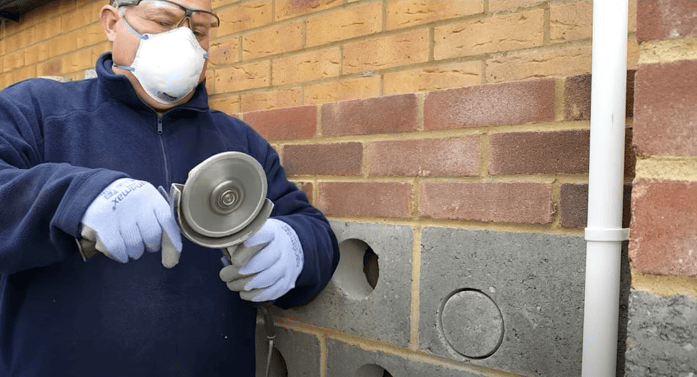
Step 2: Remove Old Mortar with a Tuck Point Blade
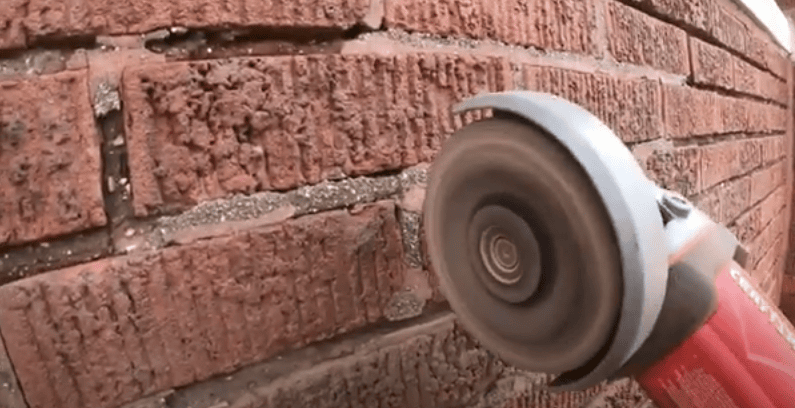
Before you start, secure the place for mortar joint removal. If working indoors, use a dust barrier to contain particles. This helps preserve the workspace smoothly and prevents dirt from spreading. You can use an attitude grinder with a tuck-point blade to grind out the vintage mortar. The tuckpointing blade cuts through deteriorated joints without damaging the bricks.
Therefore, remove at least ½ to ¾ inch of mortar for proper adhesion. This applies even for horizontal joints. Vacuum the joints to clean out loose debris. So, a smooth surface guarantees the new mortar bonds nicely. Work in small sections for better precision and management. Work in small sections to preserve manipulation and precision.
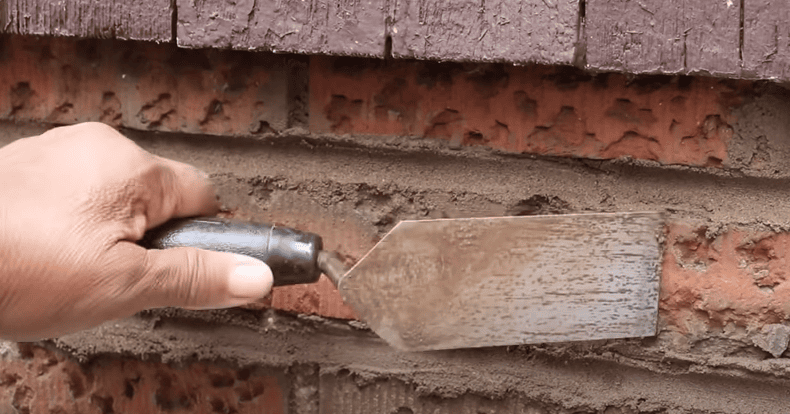
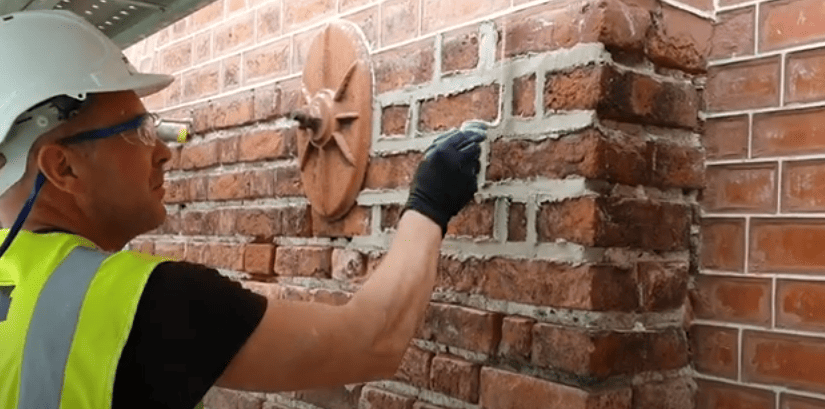
Step 3: Apply the mixture and new mortar

Prepare the wet mortar by mixing it into a thick, peanut butter consistency. If it’s too thin, it won’t hold. And if it gets too thick, it won’t spread evenly. Use a tuckpointing trowel to pack fresh mortar in cleaned joints. Ensure you press firmly to ensure strong adhesion. Then, fill each joint to prevent weak spots.
Once done, lubricate the mortar with joint equipment. This step creates a uniform, professional finish. For the best results, match the colour and texture of the new mortar with the original colour. A spontaneous repair increases both durability and appearance.
Step 4: Finish and treat the mortar

After applying mortar, clean the bricks with a moist sponge. Wipe gently to remove additional mortar without interfering with the joints. This step makes the masonry look clean. Leave the mortar for 24-48 hours. During this time, avoid touching it. To prevent cracks, moisten the surface with a small amount of water.
This will slow down drying and improve its strength. Proper drying ensures a durable, long-lasting repair. Once the set is completely set, the tuckpointing work will blend seamlessly with the original brickwork. Avoid drilling or cutting near the freshly set mortar for at least 72 hours.
General mistakes and how to avoid them
Tuck pointing requires accuracy and precision. Mistakes can weaken the structure and ruin the finish. Try to avoid these mistakes for the best results.
Why is my new mortar crumbling?
If your mortar crumbles, the mixture combination may be incorrect. Too much water makes it weak, while very little prevents proper bonding. Mix it to a thick, peanut butter consistency. Keep the joints damp while curing to avoid drying too fast. This helps the mortar to set correctly.
Why are my mortar joints uneven?
Uneven joints occur when mortar isn’t applied effectively. Use a tuckpointing trowel to spread it smoothly. Work slowly to maintain control while pressing the mortar firmly into the joints to prevent gaps. Smoothing it with a jointing tool ensures construction blocks have a clean, professional finish.
Can I use a regular grinder blade instead of a tuck point blade?
No, standard blades will not work. A tuck point blade is designed to remove the mortar efficiently. A regular blade can chip bricks and cause an uneven cut. Always use a tuck point diamond blade for clean, accurate grinding.
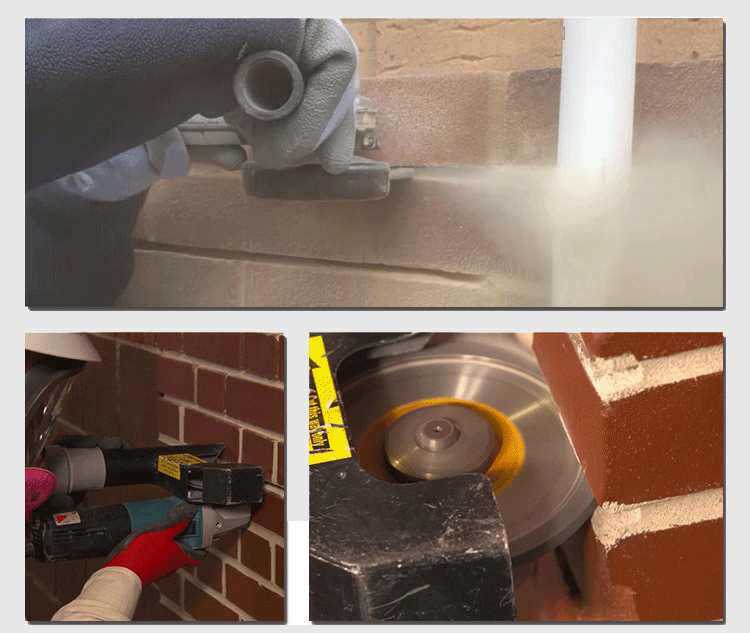
How do I stop dust when grinding mortar?
A grinding mortar produces too much dust. Use a dust shroud attachment on your mill to contain it. Moreover, wear a respiratory system to protect yourself from fine particles. Working in small sections also helps in controlling dust. Keeping the area clean improves visibility and safety.
Best Tools and Accessories for Tuckpointing
Using the right tool ensures clean, professional tuckpointing results. Here are the best options for efficiency and durability.
Top-rated tuck point tool
Dewalt DWE402 Angle Grinder
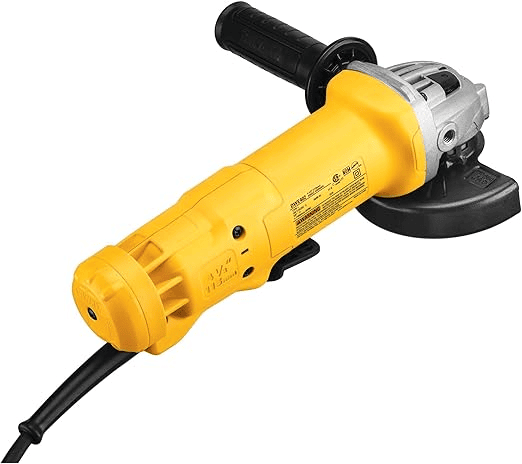
This powerful grinder provides high speed and accuracy. It works well with a tuck point diamond blade. It has an ergonomic design that allows better control and reduces fatigue.
Makita GA7021 7-inch angle grinder
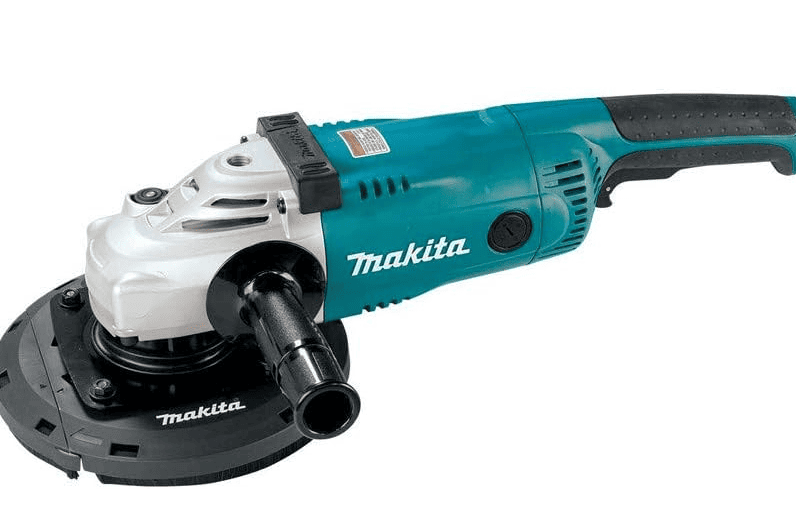
This grinder easily handles large projects. Its 15-MP motor provides strengthening power. You can use it with a tuckpointing blade for fast, clean mortar removal.
Bosch dust shroud for grinder
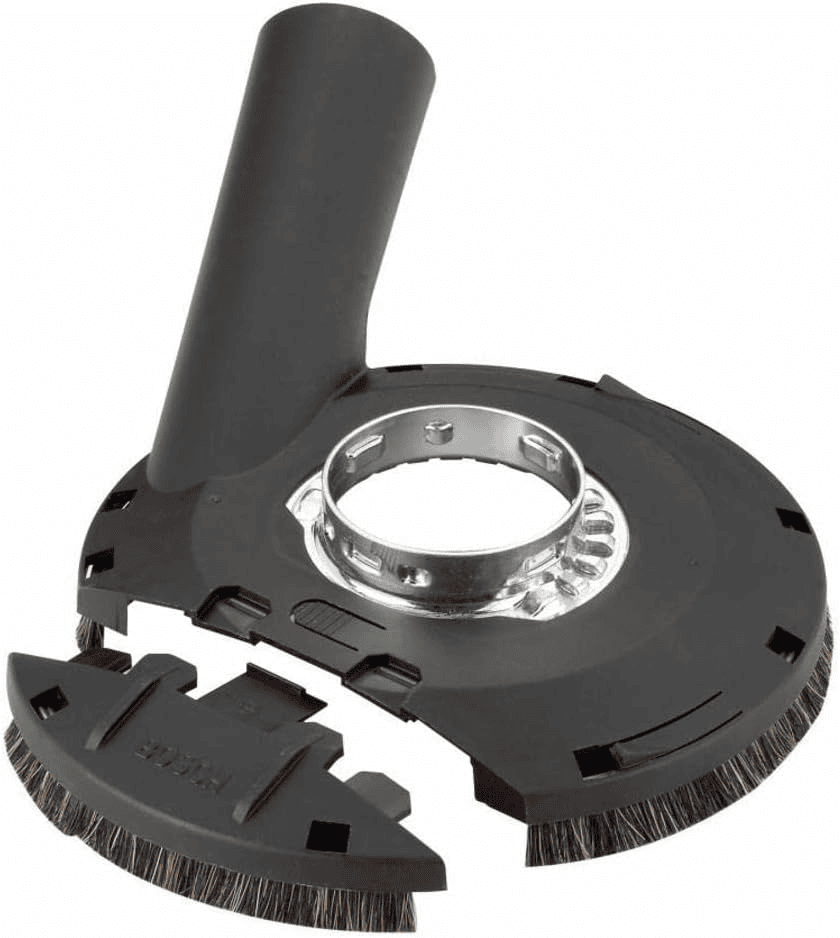
Dust control is necessary in taking points. It attaches the shroud grinder and catches the airborne debris. This improves visibility and keeps your workplace clean.
Best Tuckpointing Mortar and Accessories
Apart from having accessories for filling mortar joints, you need a strong tuck-point blade. The Johnson Tools Laser-Welded V-Shaped Tuck Point Blade is built to last and gives the best performance. The laser-welded segments ensure a reliable bond, decreasing wear and increasing the blade’s lifespan. This blade works perfectly whether you’re dealing with brick, concrete, or jointing for tuckpointing stonework projects. It produces clean and accurate cuts for bottom tuckpointed fine lines.
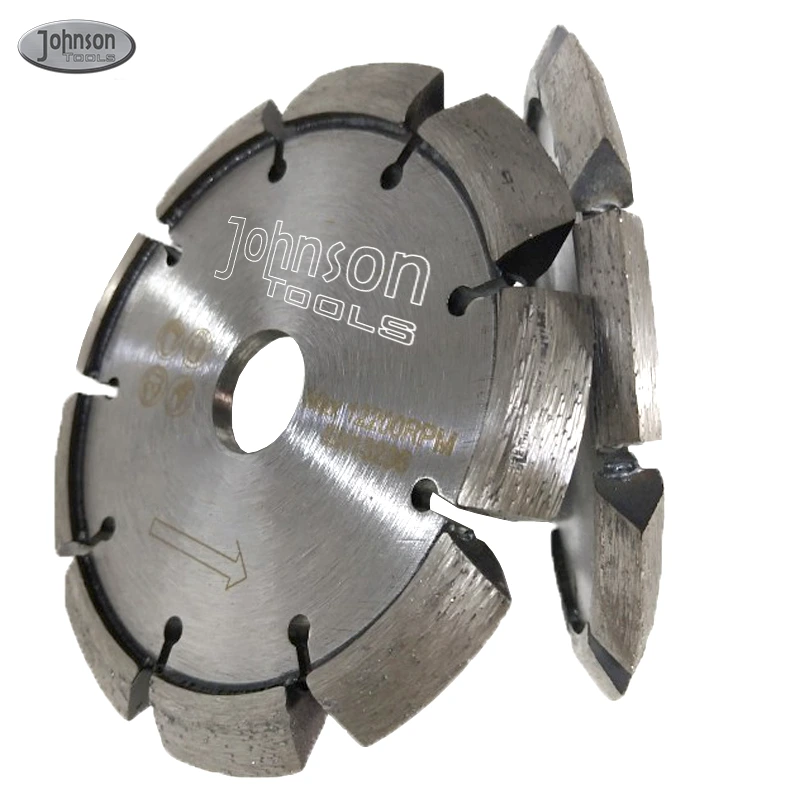
This tuck point diamond blade comes in several sizes, like 4.5″, 5″, 6″, 7″, and 9″. It is ideal for surface grinders, point grinders, and handheld saws. The V-shaped engineered blade allows contactless cutting and is suitable for crack chasing and deep joint cleanout. It can be used for wet and dry applications, so its flexibility in different job conditions is guaranteed.
The design of the V-shaped allows for the removal of deep cuts and efficient mortar. You can use this blade with a grinder and spherical, and handheld saws. It provides a tuckpointing blade with smooth and consistent cuts.
Conclusion
Tuckpointing requires skill, accuracy, and correct equipment. A tuck point blade helps to remove the old mortar efficiently. Clean joints are ensured without damaging the bricks using a tuckpointing blade. Always apply fresh mortar carefully and lubricate it with a tuckpointing trowel. A tuck-point diamond blade speeds up the process and gives professional results. Invest in high-quality equipment for better efficiency. Ready to start? Shop the best tuck point blade and tools today!

